Let’s make a Kahoot! Algebra 1 Edition!

Playing Kahoot in class is always fun. My algebra 1 students especially love it! Instead of a traditional midterm, the school I teach at does a “midterm experience”.  I decided that for the experience I was going to have my students create and then play their own Kahoots!  This experience was broken up into two days. At the beginning of the first day, I told my students that by the end of their experience they would create a Kahoot focused on one of the concepts covered this semester. However, they are unaware of  which concept until day 2.

On day one, I had students create one-sheets that covered the topics covered year. All concepts  had to be included on my one sheet. A “one-sheet” is a brain dump of a certain concept. I typically use one-sheets to help students study and review for a test. Students had to make a “one-sheet” for each concept. They could use any resources to create their one-sheets. I collected their one-sheets at the end of class on the first day.

On day two, students were assigned a partner and a concept. Students could only use theirs and their partners one sheet to create their Kahoot. Each Kahoot had to cover all the material from that chapter and include 10 questions.

After they created their Kahoots, they shared them with me and we played them as a class! It was great because I could grade their Kahoots while we were playing! It was also fun to see each others work!

I liked this assessment because it had them review all of the material we’ve done this year, but then they were only assessed on a certain concept. It was also fun to create their own Kahoots! Some of my students added pictures and videos into their Kahoots to make it more fun. We can also look back and play the Kahoots when it comes time to review for the final!

Below is the direction sheet I handed out to my students.

Screen Shot 2015-12-16 at 7.47.23 AM

Day 1:

  • At the end of this experience, you will have created a Kahoot focused on one of the concepts covered this semester. However, you will not know which concept until day 2.
  • On day one, you will be create one-sheets that cover the following topics. All concepts must be included. You may use any resources to create your one-sheets. One sheets will be collected at the end of day 1.
    • Tools of Algebra
  • Order of operations
  • Combing like terms
  • Negative Numbers
    • Exponents
  • Adding, subtracting powers
  • Dividing and multiplying powers
  • Power of zero
    • Solving Equations
  • Solving one-step equations
  • Solving two-step equations
  • Solving multistep equations
  • Solving Equations with Variables on Both sides
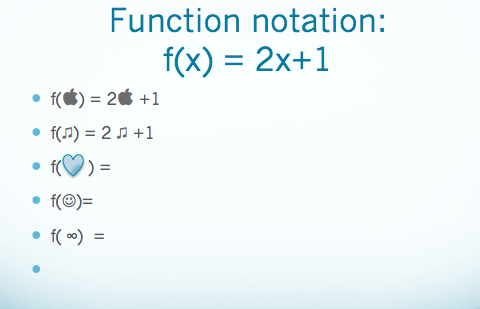
    • Functions
  • Relating Graphs to Events
  • Relations and Functions
  • Function rules, tables, graphs
  • Writing a function rule
    • Linear Equations
  • Slope and Rate of Change
  • Slope-intercept form
  • Standard form
  • Point-slope form and writing linear equations
  • Parallel and Perpendicular lines
    • Solving and Graphing Inequalities
  • Inequalities and Their Graphs
  • Solving one step inequalities
  • Solving Multi-step inequalities
  • Graphing linear inequalities

Day 2:

  • You will be assigned a partner and a topic
  • You and your partner will create a Kahoot on your topic.
    • You can only use your one sheets to create your Kahoot
    • Kahoot must include 10 questions

MTBoS Blogging Intiative

mtbos-blogging-initiativeexploremtbos


I, Julia Finneyfrock, resolve to blog in 2016 in order to open my classroom up and share my thoughts with other teachers. I hope to accomplish this goal by participating in the January Blogging Initiative hosted by Explore MTBoS.

You, too, could join in on this exciting adventure. All you have to do is dust off your blog and get ready for the first prompt to arrive January 10th!

Grading made easy with Desmos Activity builder

In my geometry class, I have been using Desmos Activity builder to teach finding points of concurrency algebraically. In order to assess my students on this unit, I decided to create a Desmos Activity. I also created a packet that had the same questions that were on my Desmos Activity for students to use to show their work. I like using Desmos because it allowed my students to check their answers easily by entering thier equations or coordinates. I can ask questions that don’t involve graphing, and it easily organizes students answers. It also made grading SUPER EASY.

When grading with Desmos you can either grade one student at a time by clicking on their name OR you can grade one  question at a time. I decided to grade one question at a time. Because each students answers showed up at once for each problem I could quickly see which students answered incorrectly. You can also overlay all of the graphs to check students anwers quickly. If no students answered incorrectly I can see that immedietly.

In order to grade most efficiently, I created a grading grid (I usually use this to record homwork) with every student in the class’ name. Instead of putting the date at the top like I usually do, I put the Desmos slide number, the packet question number, and the amount of points each question was worth. I used this grading grid to grade this assessment. If student got the question correct I put a check in the box, if the student made a small mistake (and I could tell what they did from the answer) I would put minus the amount of points they’d lose for that question in the box. If I couldn’t figure out their mistake from their answer then I would write “check” in the box. When I finished grading all of the questions I would go through each students test. I ONLY looked at the problems where I wrote “check”.  I use erasable pens when grading, so after I checked their work I could go back and change the grade in the box easily.

This was an extremely long assessment and took NO time to grade. Using Desmos  for a quick quiz would be even easier! This was my first time using desmos for an assessment, but I’m definetly going to use it again!

Screen Shot 2015-12-21 at 3.53.43 PM

Review Day with QR code Stations…Points of Concurrency!

Today was my first time really using QR codes in class. So far in class students have found the circumcenter, orthocenter, and centroid separately, but never on the same triangle. In order to review for our test, I wanted students to practice finding points of concurrency, but I also didn’t want them calling me over every minute asking if their equations were correct.

I created three stations, one for each point of concurrency. However, I didn’t write what point of concurrency they were finding. Each sheet started with a part 1. In part 1, students had to find the equations of the sides of triangle, given the three points. No matter what station the student started at they only had to do part 1 ONCE. Students were then given instructions on what I wanted them to do. Each station was a different color and told students to keep track of their colors. When they finished the directions they would scan the QR code and it would take them to a Desmos graph of their specific station. I had the graph organized and labeled and in the order of which they found the information. When students got a difference answer than me this made the process of figuring out where they went wrong. Questions like… did you have the same midpoints, did you have the same slope, are your equations the same… really helped them and myself pinpoint where they were making the most mistakes. Students had to find where the point of concurrency was located in every station and then tell me which point they found. I liked this part because it had them go back and reflect on the process.

In my first class of the day, I only gave each station the instructions and told them to show their work. For the second class, I made an organizer for each station. Step 1 had its own page because that was the same no matter what station they started at. I asked my students if they felt the organizer was helpful. They told me that it was confusing at first, but they felt that it helped them keep their equations organized and that it was a good tool to help them study. I’m definitely making changes to it for next year, but here it is if you want to check it out!

Also here are my Desmos graphs for the circumcenter, orthocenter and centroid answers!


Linear Functions Practice with Stations

My algebra 1 class only has 11 students who all work at very different paces. I don’t really like doing traditional stations because they tend to talk and not do their work, especially if the answers are at their table.  I arranged this activity based off of math sprints from I love Math. I changed the activity to focus on everything we’ve focused on this unit.

Each student started off with sheet #1. . I had all of the answers for all four sheets glued on the inside of a folder that I kept upfront with me. When students finished the first sheet they came to me to check their answers. When they got one incorrect I would circle it and send them back to their seats.  When students came to me with a completed and correct sheet they were able to get the next sheet.  I personally thought the sheets became slightly harder as class went on.

Because students were checking their answers with me, I was able to see what each student understood and how they improved throughout the class.Because every student worked at their own pace I was able to help every student. I was also able to see what the class as a whole was struggling on. I’m not sure how this would work in a  larger class, but in my class of 11 very hyperactive students it was perfect! They loved getting to move around and get instant feedback on their work.

At the end of class I had them staple all four sheets together and told them this was their Linear Equation Book (so far). I’ve found that they also love having practice problems and notes all in one place (the more compact the better). I teach very interactive, so students tend not to take detailed notes in my class. I’d rather them be engaged all during class and have this small book of practice problems to refresh their memories.

Their linear equation books include. . .

Sheet #1: Finding slope between two coordinate points

Sheet #2: Graphing Linear Equations

Sheet #3: Finding the equation of a line when given a graph

Sheet #4: Finding Equations of Lines given two coordinate points

I taught students how to find equations of lines given two coordinate points during the beginning of class using a Writing an Equation from 2 Points Template from the Algebra Toolbox Blog. Every student had a template in a sheet protector and a dry erase marker. We did a few together and I walked them through the template. I then put coordinates on the board and had students create equations by themselves.  After every equation, we would check them! My students love to compete against each other so they would race to see who finished first. They love the template, but it’s been difficult weaning them off of it. I plan to have them journal quickly at the beginning of class about what they are actually doing in the template to gage their understanding.

Teaching Points of Concurrency Algebraically using white boarding, Peardeck and Desmos Activities!

Let me just start off by saying I LOVE Desmos Activity Builder. I’ve used already made ones for my algebra 1 class, but I decided to make my own for this unit in geometry. We just finished up our proving triangle congruence unit and started talking about points of concurrency. My students were introduced to the points of concurrency in our construction unit, but now we were learning how to find them algebraically.  Also if you click on the links it will take you directly to my activities for Desmos and Peardeck!

Day 1 ( 90 minute )

I’ve thrown in algebra concepts all year through weekly problem sets using Delta Math. They did a lot of practice identifying slopes of lines and perpendicular lines by looking at an equation in standard form. So the first day was a refresher of identifying slope in standard form, and writing equations in standard form when given only the slope. We also practiced finding slope and then putting it into stardard form and solving for c.

I do a lot of partner white boarding in my class to do practice problems. In parter white boarding each table of two has 1 white board and one marker.  Partners have to work together and talk about the problem to complete it. This also gives me a great chance to walk around and help students who are struggling.  Students practiced finding equations of lines in standard form when given two points. I embedded a desmos link into my peardeck so students could check their answers with their partner. Students also practiced finding perpendicular lines.

The last problem of the class asked students to plot three coordinate points in their peardeck. My students were confused at first on why I was having them graph three points. Students quickly noticed that the three points create a triangle. With their partners students worked together to find the equations of the lines of the triangle and the perpendicular bisector of each side. I didn’t introduce that the point of intersection was  the circumcenter quite yet.

When I do this next year I would give them more time to practice writing equations of lines in standard form and introduce perpendicular bisectors the next day. Here is a link to my PearDeck for Day 1.

Screen Shot 2015-12-04 at 4.36.17 PM

Day 2 (55 min) 

Day 2 started with my students checking their homework. I ususally have my homework answers in a google doc that I embed in my peardeck. This allows students to check their homework as soon as they walk in, and have the answers on their computer so they can check at their own pace.

On the next slide, I had a link embedded  student.desmos.com, so they were directly taken to the next activity. I gave them the code to start their Desmos Activity. This is the first Desmos Activity that I created! It was awesome. I also had the activity (and my peardeck) pulled up on my ipad. This allows me see all of my students work while I walked around the classroom. I could also control my Peardeck through my Ipad, so I can control my slides and be anywhere in the room.

This Desmos Activity focused on finding perpendicular bisectors on every side of the triangle and discussed how they were finding the circumcenter of the triangle. At the end of the activity students were asked to check their equations again mine and then they imedietely were taken back to PearDeck. Then on Peardeck we received solving systems of equations to find where our circumcenter is located. I really wanted my students to nail down another form besides slope-intercept and solve systems other than substitution, so I had my students keep their equations in standard form and solve systems only using elimination. It was challenging at first, but my started are really starting to understand using standard form.

Day 3

Day three started the same way with students checking their homework on peardeck and answering homework questions. Day 3 was focused on finding the centroid. We worked on finding the midpoints and I had them check their midpoints compared to mine before moving on. Then I introduced creating medians from the midpoint to the opposite vertex. Student’s were able to practice with their partners and then were able to check their answers on the embedded Desmos.

Day 4

Day 4 was probably my favorite day. After checking homework and answering questions, I briefly introduced how to find the orthocenter via peardeck and then sent students to a desmos activity. This activity scaffoled the entire proccess. Students were able to go through each step and check their work against mine on each slide. Here is a link to my Desmos Activity!

I really like the activity builder for finding points of concurrency algebraically because students can check their work by graphing, can work at their own pace, and I can see their classwork during and after class! Although tricky, students are really grasping writing equations in standard form and finding the different points of concurrency. I loved this unit. It’s so fun to see how geometric shapes work algebraically !


Radical Jail … Prison Break Edition!

We just finished up our triangle congruence proofs and were moving on to exploring the pythagorean theorem and special right triangles. I noticed that my students heavily relay on their calculators for EVERYTHING, so I decided to include a lesson that explored roots (which I realized they never learned?) and simplifying radicals.

I started the class by giving students a root exploration activity created by Julie Reulbach. I told my students that they could work with a partner and each at least one person needed a graphing calculator. This activity explored the relationships between squauring and taking the square root, and cubing and taking the cubbed root of a number. When my students first saw a cubed root I was asked “Do we multiple 3 by the square root of 5?” It did not occur to be that this was the first time that they ever saw a cubbed root. They worked through the activity and then we discussed the answers.


Next, I told my students to get one whiteboard and one marker for each group of 2. I told them today they were going to learn how to break out of radical jail.  I started out by putting the square root of nine and asking them how they knew it was 3. They told me because 3 times 3 was 9. I then gave them the square root of 8 and asked how we could put this is simpliest form without using a calculator. My students knew that we had to use prime factorization!

Screen Shot 2015-11-20 at 10.46.17 AM

I told my students to think of the radical symbol as a jail cell and anything inside the radial is in jail. When we are simplifying radials we want to them escape radial jail. When we are helping them escape we use prime factorization to break up the inmates into prime people. I had my students circle every prime person. We talked about how a prime person could NEVER escape radical jail alone. The index tells the students how difficult it is to break out of the jail and how many prime people there need to be escape. When we were taking the square root I told my students that they need two prime people who are the exact same in order to escape radical jail. I had students put a box around the groups of two. If a prime person didnt have a partner in crime then they were stuck in jail. If they did have a person only one of them made it out alive but they needed each other to make it out of jail. 

My students loved this! I put problems up on the board and told them to help them get out of radical jail! I had them work with the person next to  them on their whiteboard. I love only giving each group one marker. It makes sure that they are talking about how to figure out the answer and not just working indivually.

IMG_6503

I used this lesson to lead into using the pythagorean theorem to find the relationships between the sides of special right triangles! Overall, it was a pretty fun and successful lesson! Let me know if you have any questions about escaping radical jail!

Survival Guide for Proving Triangle Congruence

I am constantly AMAZED on how create my students are.  I occasionally try and throw in an assessment that is NOT a test because I have a lot of students who don’t test well.  We just finished up our unit on proving triangle congruence, and I decided that my students would make a proof survival guide for their assessment. I gave them two and a half class periods (the same amount of time I would have spent reviewing and testing)  to work on the project. Many students also worked on it over the weekend and at home.

  • Introduction:
    • Provide a table of contents.
    • Introduce your project. Talk about your experience with proofs (if you like them, dislike them, easy, hard).
    • Discuss what you are going to talk about in your guide.
  • Model Proofs (with helpful hints)
    • Prove triangle congruence by the following.
      • SSS
      • SAS
      • ASA
      • AAS
      • CPCTC
    • For the “helpful hints” students had to provide an insight into their thought process when solving proofs. If someone was trying to solve their proof what type of things would they have to think about?
  • Practice Problems
    • Students had to provide 5 practice problems  for proving triangle congruence. Students also had to provide an answer key for the practice problems.
  • What doesn’t work?!
    • In this section, students had to explain what pieces of information wouldn’t work for proving triangle congruence (SSA and AAA). They were required to provide pictures to help their explanation.
  • Triangles in the Real world
    • Students had to research where triangles were used in the real world. They also had to research which type of jobs would require knowing properties of triangles and triangles congruence.
  • Conclusion/Reflection
    • In this section, students had to provide a thoughtful reflection about the proof process and their project.

I provided my students with these guidelines and also a grading rubric with my expectations. They could present their survival guide in any way they wanted to. I provided poster board, markers, and construction paper during class. A bunch of students created their project on Keynote, pages, and powerpoint. Others created their survival guide in a small notebook, huge poster, FBI secret files, scrapbook pages, and many more!! I’m always so impressed when I have students do projects. I love giving my students the autonomy on assessments. Even the small the choice of choosing how they want to present it inspires so much creativity that I normally don’t see in the classroom!

Below are pictures of a few of the projects and here is my rubric and guidelines for the project! Let me know if you have any questions!


Life Size Function Machine!!!!

Functions are always fun to teach in Algebra 1. I’ve seen different function machines used to explain functions and the idea that every input has exactly one output. I LOVED Sarah Hagan’s unit on functions. I used a lot of her worksheets when I taught Math 1 last year. I love that she had an actual function machine that changed the inputs into outputs.  I wanted to create something that was interactive for my very energetic students to help them understand functions. I decided that I wanted to create a life-size function machine for my students to go through. However, we didn’t use the function machine until day 2 of functions!

Day 1 (50 min) 

I created a Peardeck presentation to introduce relations and functions. I started by using the Fryer Model to define a relation. I actually took a picture of my Fryer Model and discussed it, instead of having my students fill it out. On Peardeck, students receive takeaways from the lecture, so my students have my model in their google drive. After discussing relations, I asked my students to give me examples of a relations  using ordered pairs. We then did the same thing for defining a function. Students then gave me examples through peardeck of functions and explained the difference between a function and a relation. We practiced function mapping using x and y coordinates and also inputs and outputs.

Next, we moved into our discussion of domain and range.  I used Sarah’s mnemonic device  DIXROY with my students. DIX: Domain, Inputs, X-Coordinates. ROY: Range, Outputs, Y-Coordinates.  My students found that DIXROY was funny to say, so whenever I would say it they’d all laugh  We will see how well it well help them remember everything though!!

Day 2 (95 min) 

I started day two out with vertical whiteboarding. I have 11 students in my algebra 1 class, and they each got in groups of two or three and stood by the white board. Each group only had one marker. On the board I had a list of ordered pairs. My students had to identify the domain and range of the ordered pairs and state if it were a function or not. Because each group only had one marker, the group had to work together to come up with an answer. It seemed as though most of my students retained the information from the class before.

IMG_6420IMG_6418

Next I introduced function notation. I started by giving my students a function, but writing it as y= 3x +2. Still on their whiteboards, I had students solve for y if x= 2, x= 5, x= 10 ect. I then introduced function notation… first with an example using x and then we used symbols (hearts, smiley faces, apples). After showing a few examples, students worked through the functions using symbols on the whiteboards. It wasn’t until after the symbols that we practiced function notation with numbers.

Screen Shot 2015-11-09 at 7.07.54 PM

My students are extremely rambunctious and sometimes it’s hard to get them to focus. Vertical white boarding keeps them focused and constantly working. I can also see everyone’s work from the middle of the room which is AMAZING. . Thanks for the great idea Anna!!

Now it was finally time to bring out the FUNCTION MACHINE!!!!!! 

IMG_6431

I made my function machine out of a refridgerater box from Lowes and then decorated it! On the top of the machine I had a “function calculator”. I really wanted my students to understand that there is exactly one output for everyone input.  Taped inside the box were blank square green cards and markers. These green cards were the output cards.  I had students break out into their same groups and each group recieved a function. Each group had a chance going through the function machine with their function. When they were going into the machine I gave them a blue “input card” with a number on it. Insde the machine they had to figure out the output and write it on the green card. They left their input card inside the box and brought their output card out with them. I had the other students try and guess what the output would be.

IMG_6425 IMG_6423 IMG_6421

After every group went through the machine, I gave each group a secret function. I told them that only their group memebers were allowed to see the function. Each group had to come up with inputs and outputs for their functions. They then took turns going through the function machine with inputs and coming out with their outputs. We kept a table of the inputs and outputs on the board. The rest of the class then had to guess the pattern to figure out the function.

IMG_6428 IMG_6426

This was a great activity. My students were engaged the entire time and really started to understand functions. Next time, I plan to make the functions into a type of necklace that each student can wear so they feel like they are the actual function. I may also create a worksheet that students can fill in during the activity.

The next day was spent figuring out patterns and function rules using an online function machine. This site was great. Because my students already played around with the life sizse machine the day before, they understood this machine and looking for patterns right away. After working the machine for about 20 minutes, we had a great discussion about finding the function rules.

Overall, this unit has gone pretty well. The life-size function machine was a lot of fun!!! I really liked that my students went in with an input and then had to figure output while inside the machine. Let me know if you have any questions!!! More pictures of the function machine are below!!

IMG_6441 IMG_6433 IMG_6431 IMG_6430

Using Edpuzzle in the classroom

I was missing class last week for a conference, and I didn’t want to lose a day with my Geometry class by giving them busy work. We’ve been working on parallel line indirect proofs by working through Parallel Line Land mazes.  While I was gone I wanted to introduce them to parallel line direct proofs. This was a long block day (1:30 class), so they had plenty of time to be productive. Our schedule rotates, and it happened that I would be in class for 2 sections of geometry on Tuesday, but miss one section on Wednesday. I decided to try out my plan with my Tuesday classes and then tweak my lesson so my students on Wednesday could do it without my help.

I was slightly familiar with using EDpuzzle but never used it in class before. Edpuzzle is a tool that is typically used in a flipped classroom. You can upload videos, add voice overs, comments, and questions for students to answer.

I didn’t make my own video, but found a one that walked students through a formal proof. During the video I created scaffolding questions. I wanted my students to be engaged in the video. Just like with flipped classroom videos, the length of the video should be 7 minutes tops! If you need the video to be longer you should split it up into multiple videos. I noticed that students zone off if it the video is too long.

At the end of the video, I added a comment with directions to practice proofs on different websites. The first site had a proof and then had students fill in the last “reason” of the proof. The second site was a little more difficult.  Students were given “the givens” and what they were trying to prove. They were also given a list of statements. They had to click on the statement that should come first and then a list of givens popped up and they had to pick which one went with the statement. This really confused my students when I wasn’t there to help them, but once I explained the concept they understood.

After they finished working through the links,  I  added a place for students to tell me how they felt about the video/websites and if what questions they had.

For homework students had 3 proofs they needed to work through. I created another edpuzzle for the next class (I was out two days) of me explaining the homework, so students could watch it and ask me questions while I was out.

Screen Shot 2015-10-22 at 9.19.20 PM Screen Shot 2015-10-22 at 9.19.44 PM Screen Shot 2015-10-22 at 9.24.05 PM

Screen Shot 2015-10-22 at 9.55.21 PM

After seeing the questions by two classes had about the activities, I typed up a sheet answered all of the questions that I was asked.  I wanted to make the activity completely doable. I left a huge sub  folder with materials for my students. However, my sub somehow did not get my sub folder and my students were in a PANIC trying to figure out what to do. This activity also required students to try and really think about proofs, so students had a difficult time understanding that they could struggle. “Productive struggle” is a phrase we use daily in class, however, without my direction sheets and without me being there to help, students felt completely lost 😦 I would recommend not using this for a sub plan. It worked so much better when I was there!

However, I really do like edpuzzle. It was a great way to get feedback and give video lessons or just a review of homework. You can set due dates for the completions of the videos, but students can watch the video whenever and how many times they like!