Review Day with QR code Stations…Points of Concurrency!

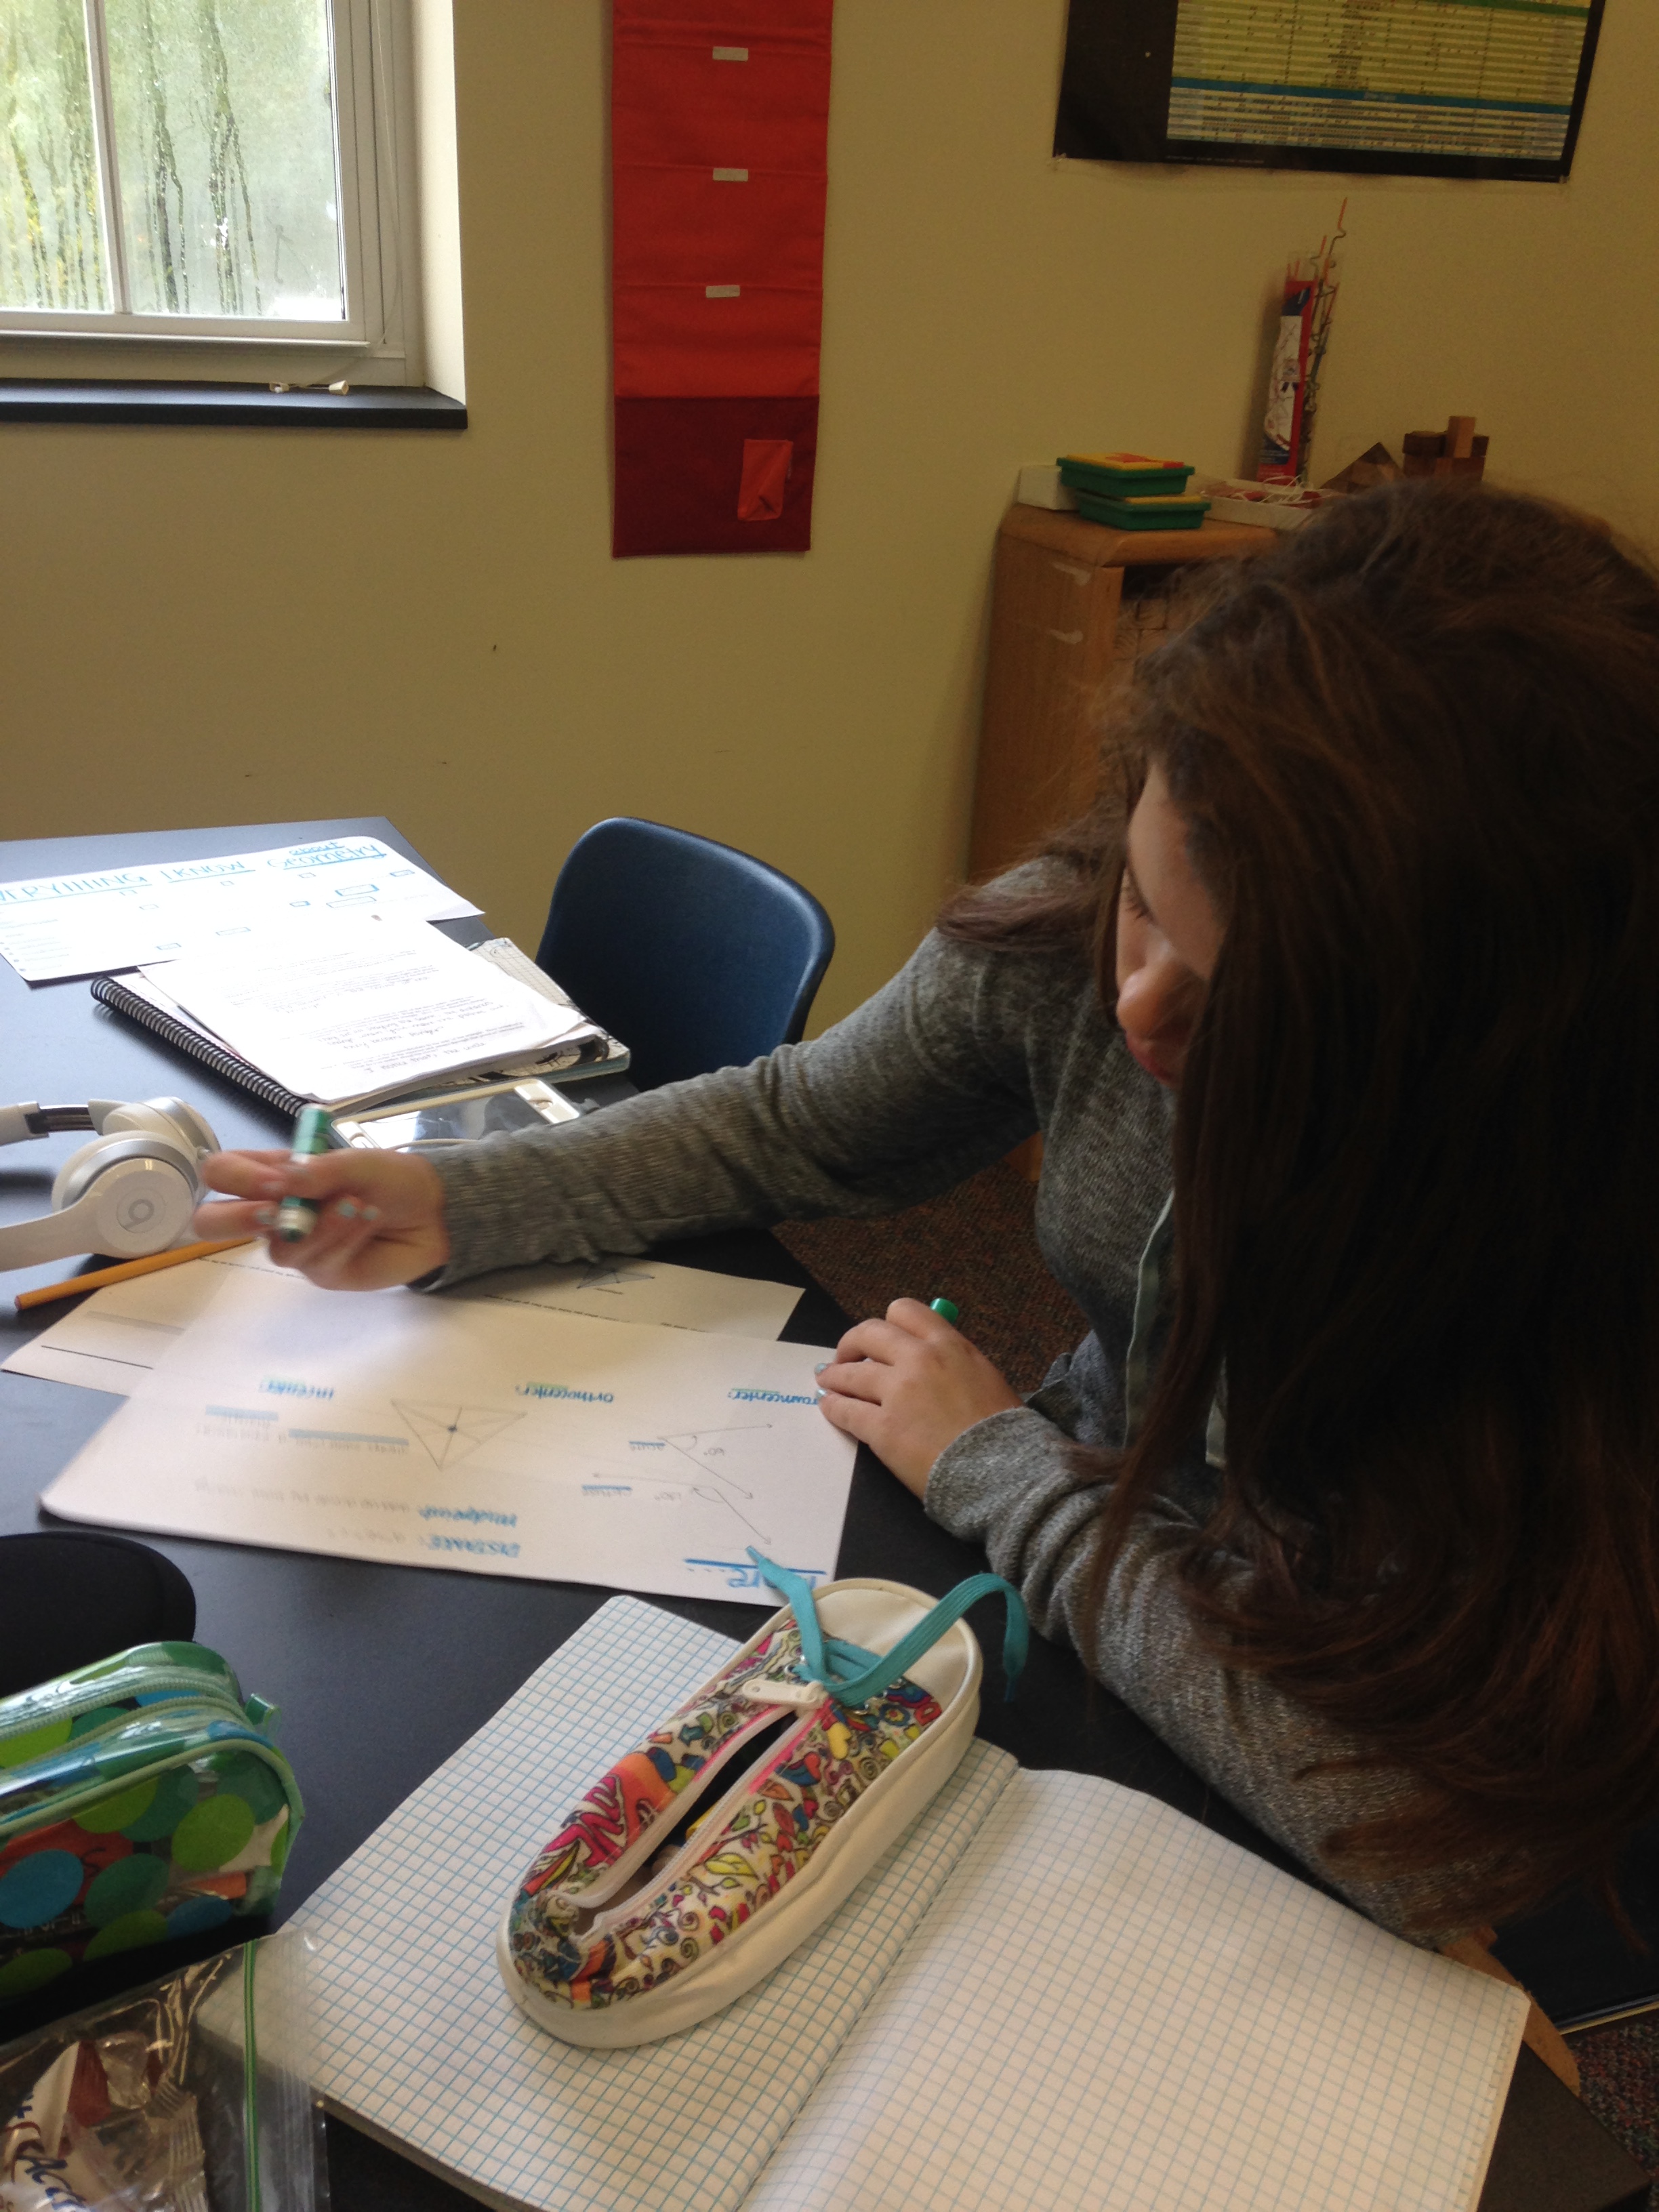
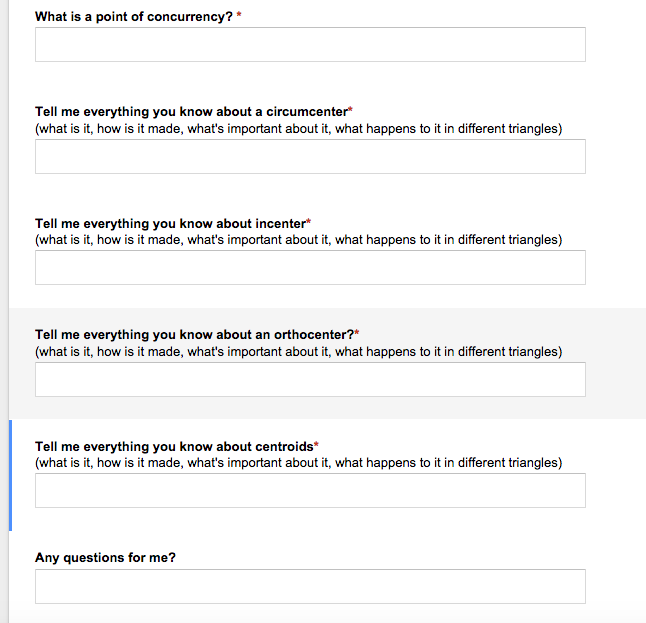
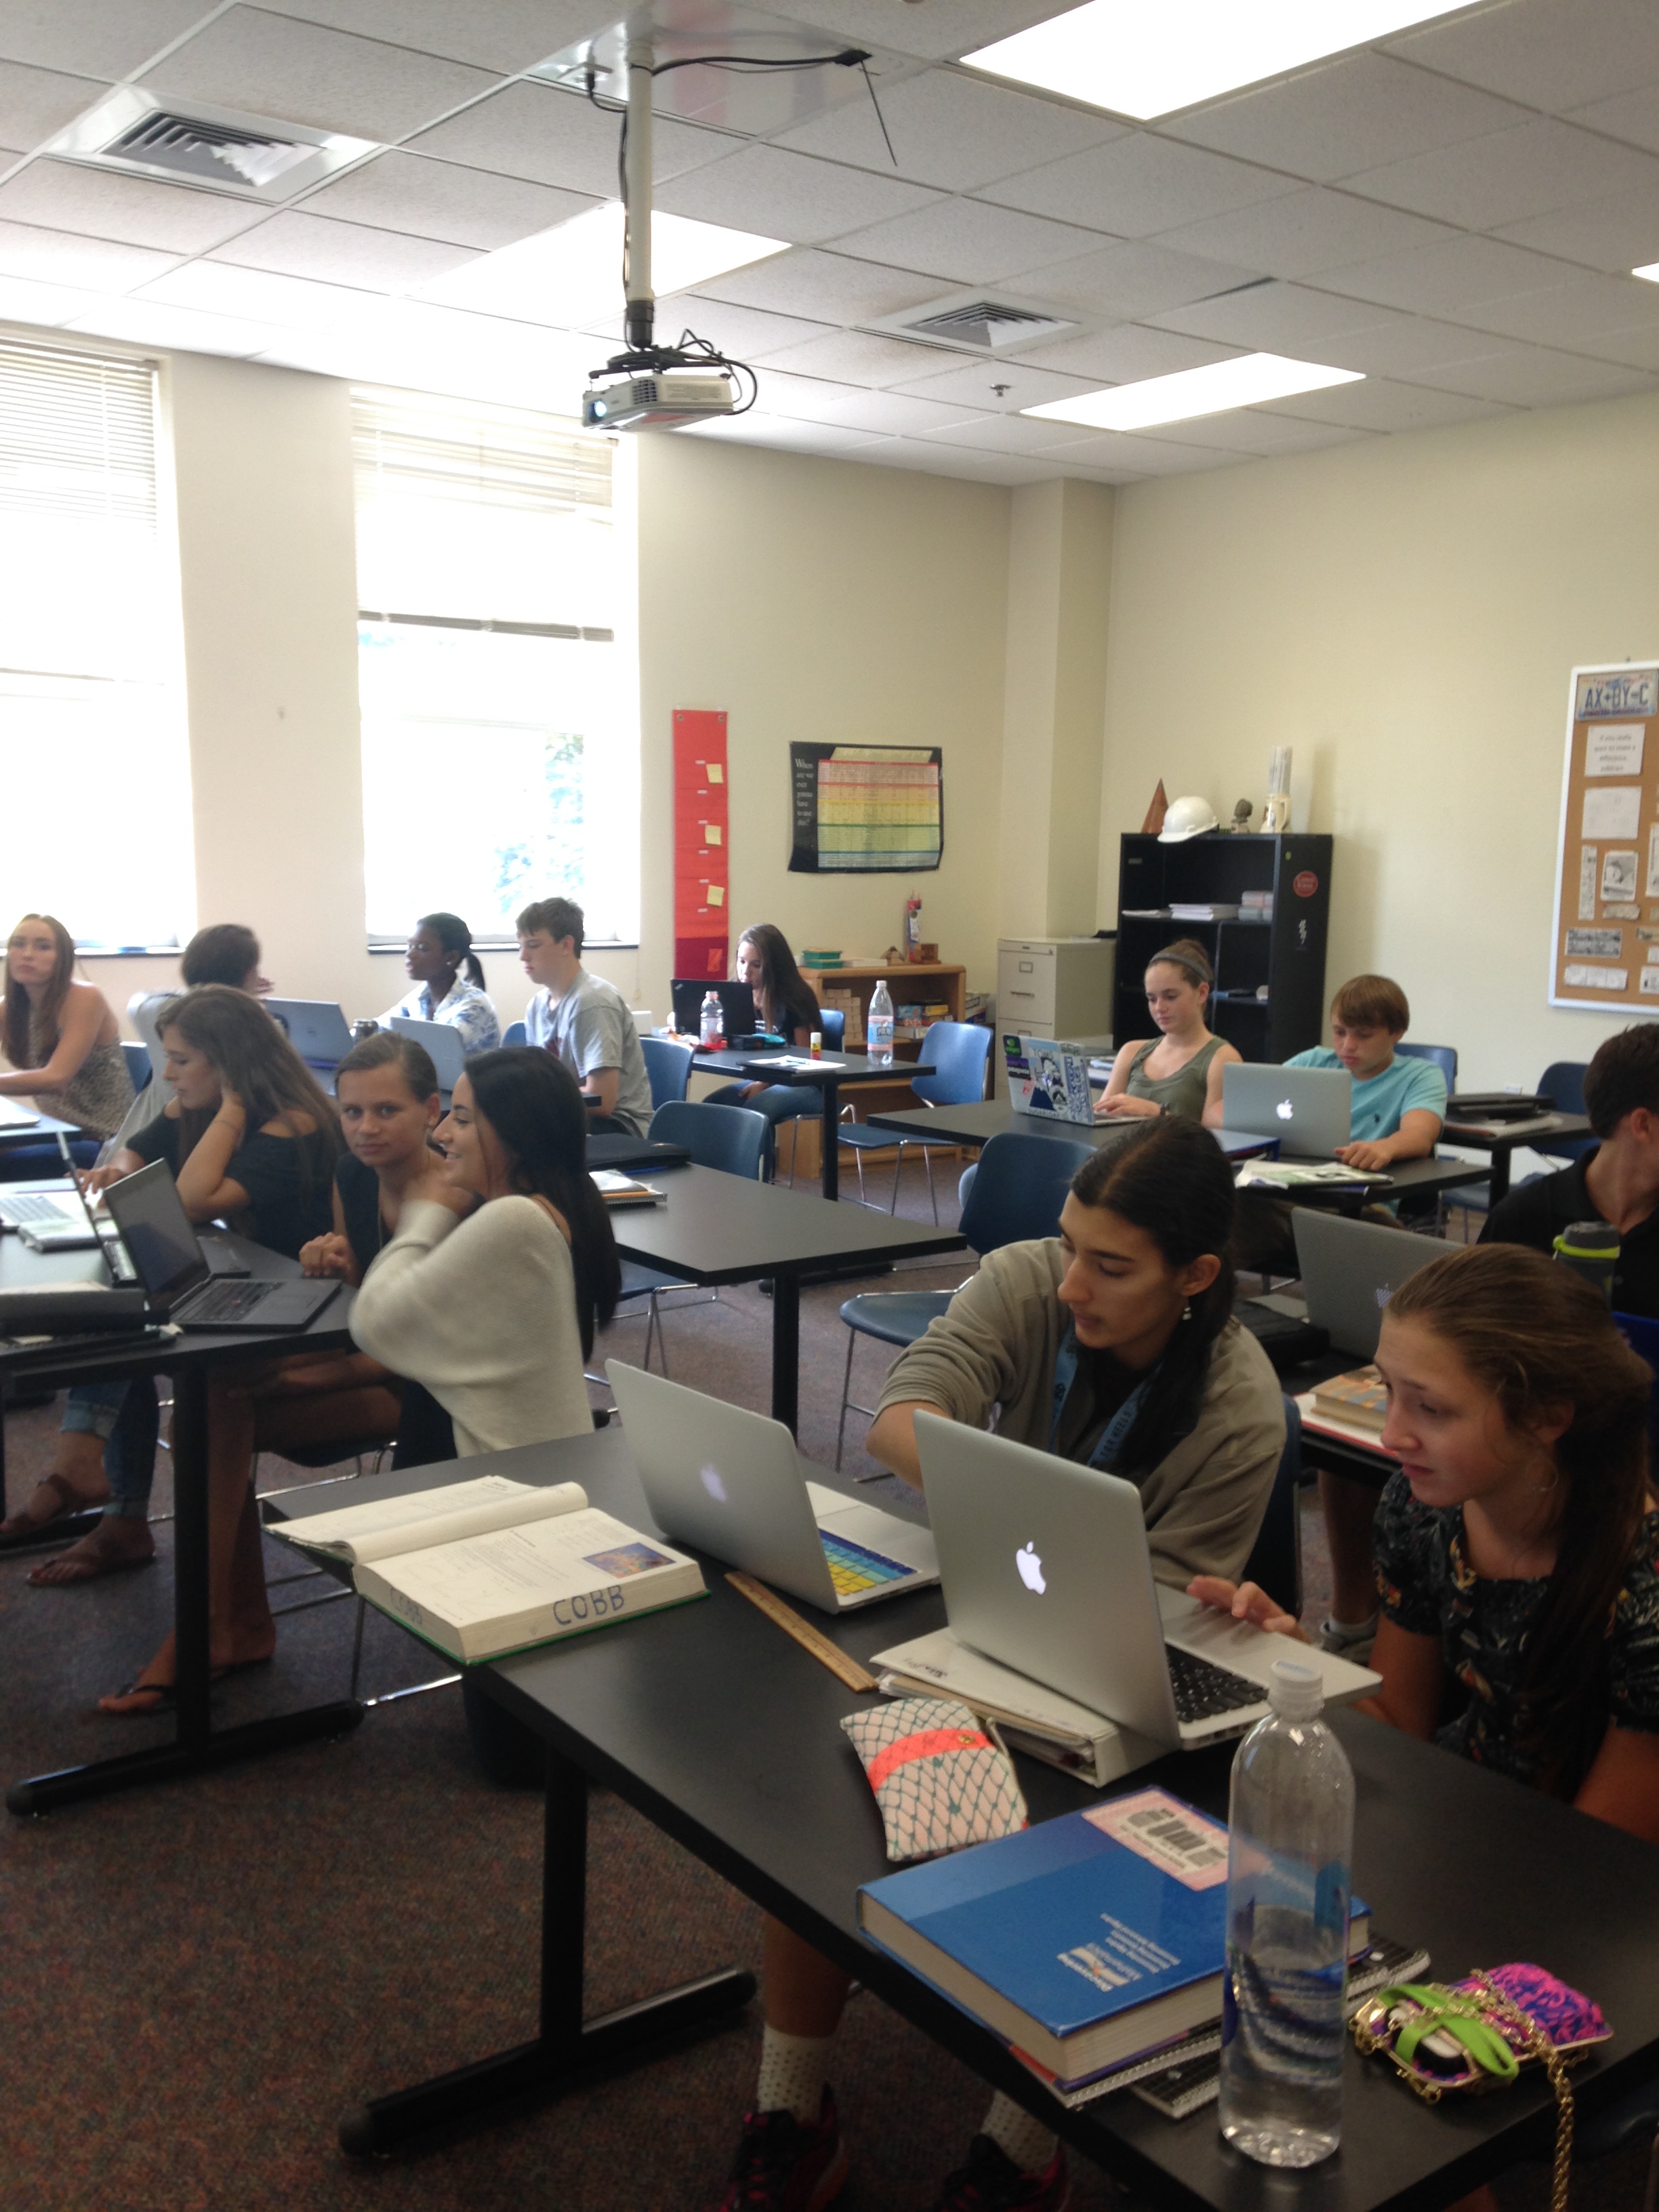
Today was my first time really using QR codes in class. So far in class students have found the circumcenter, orthocenter, and centroid separately, but never on the same triangle. In order to review for our test, I wanted students to practice finding points of concurrency, but I also didn’t want them calling me over every minute asking if their equations were correct.

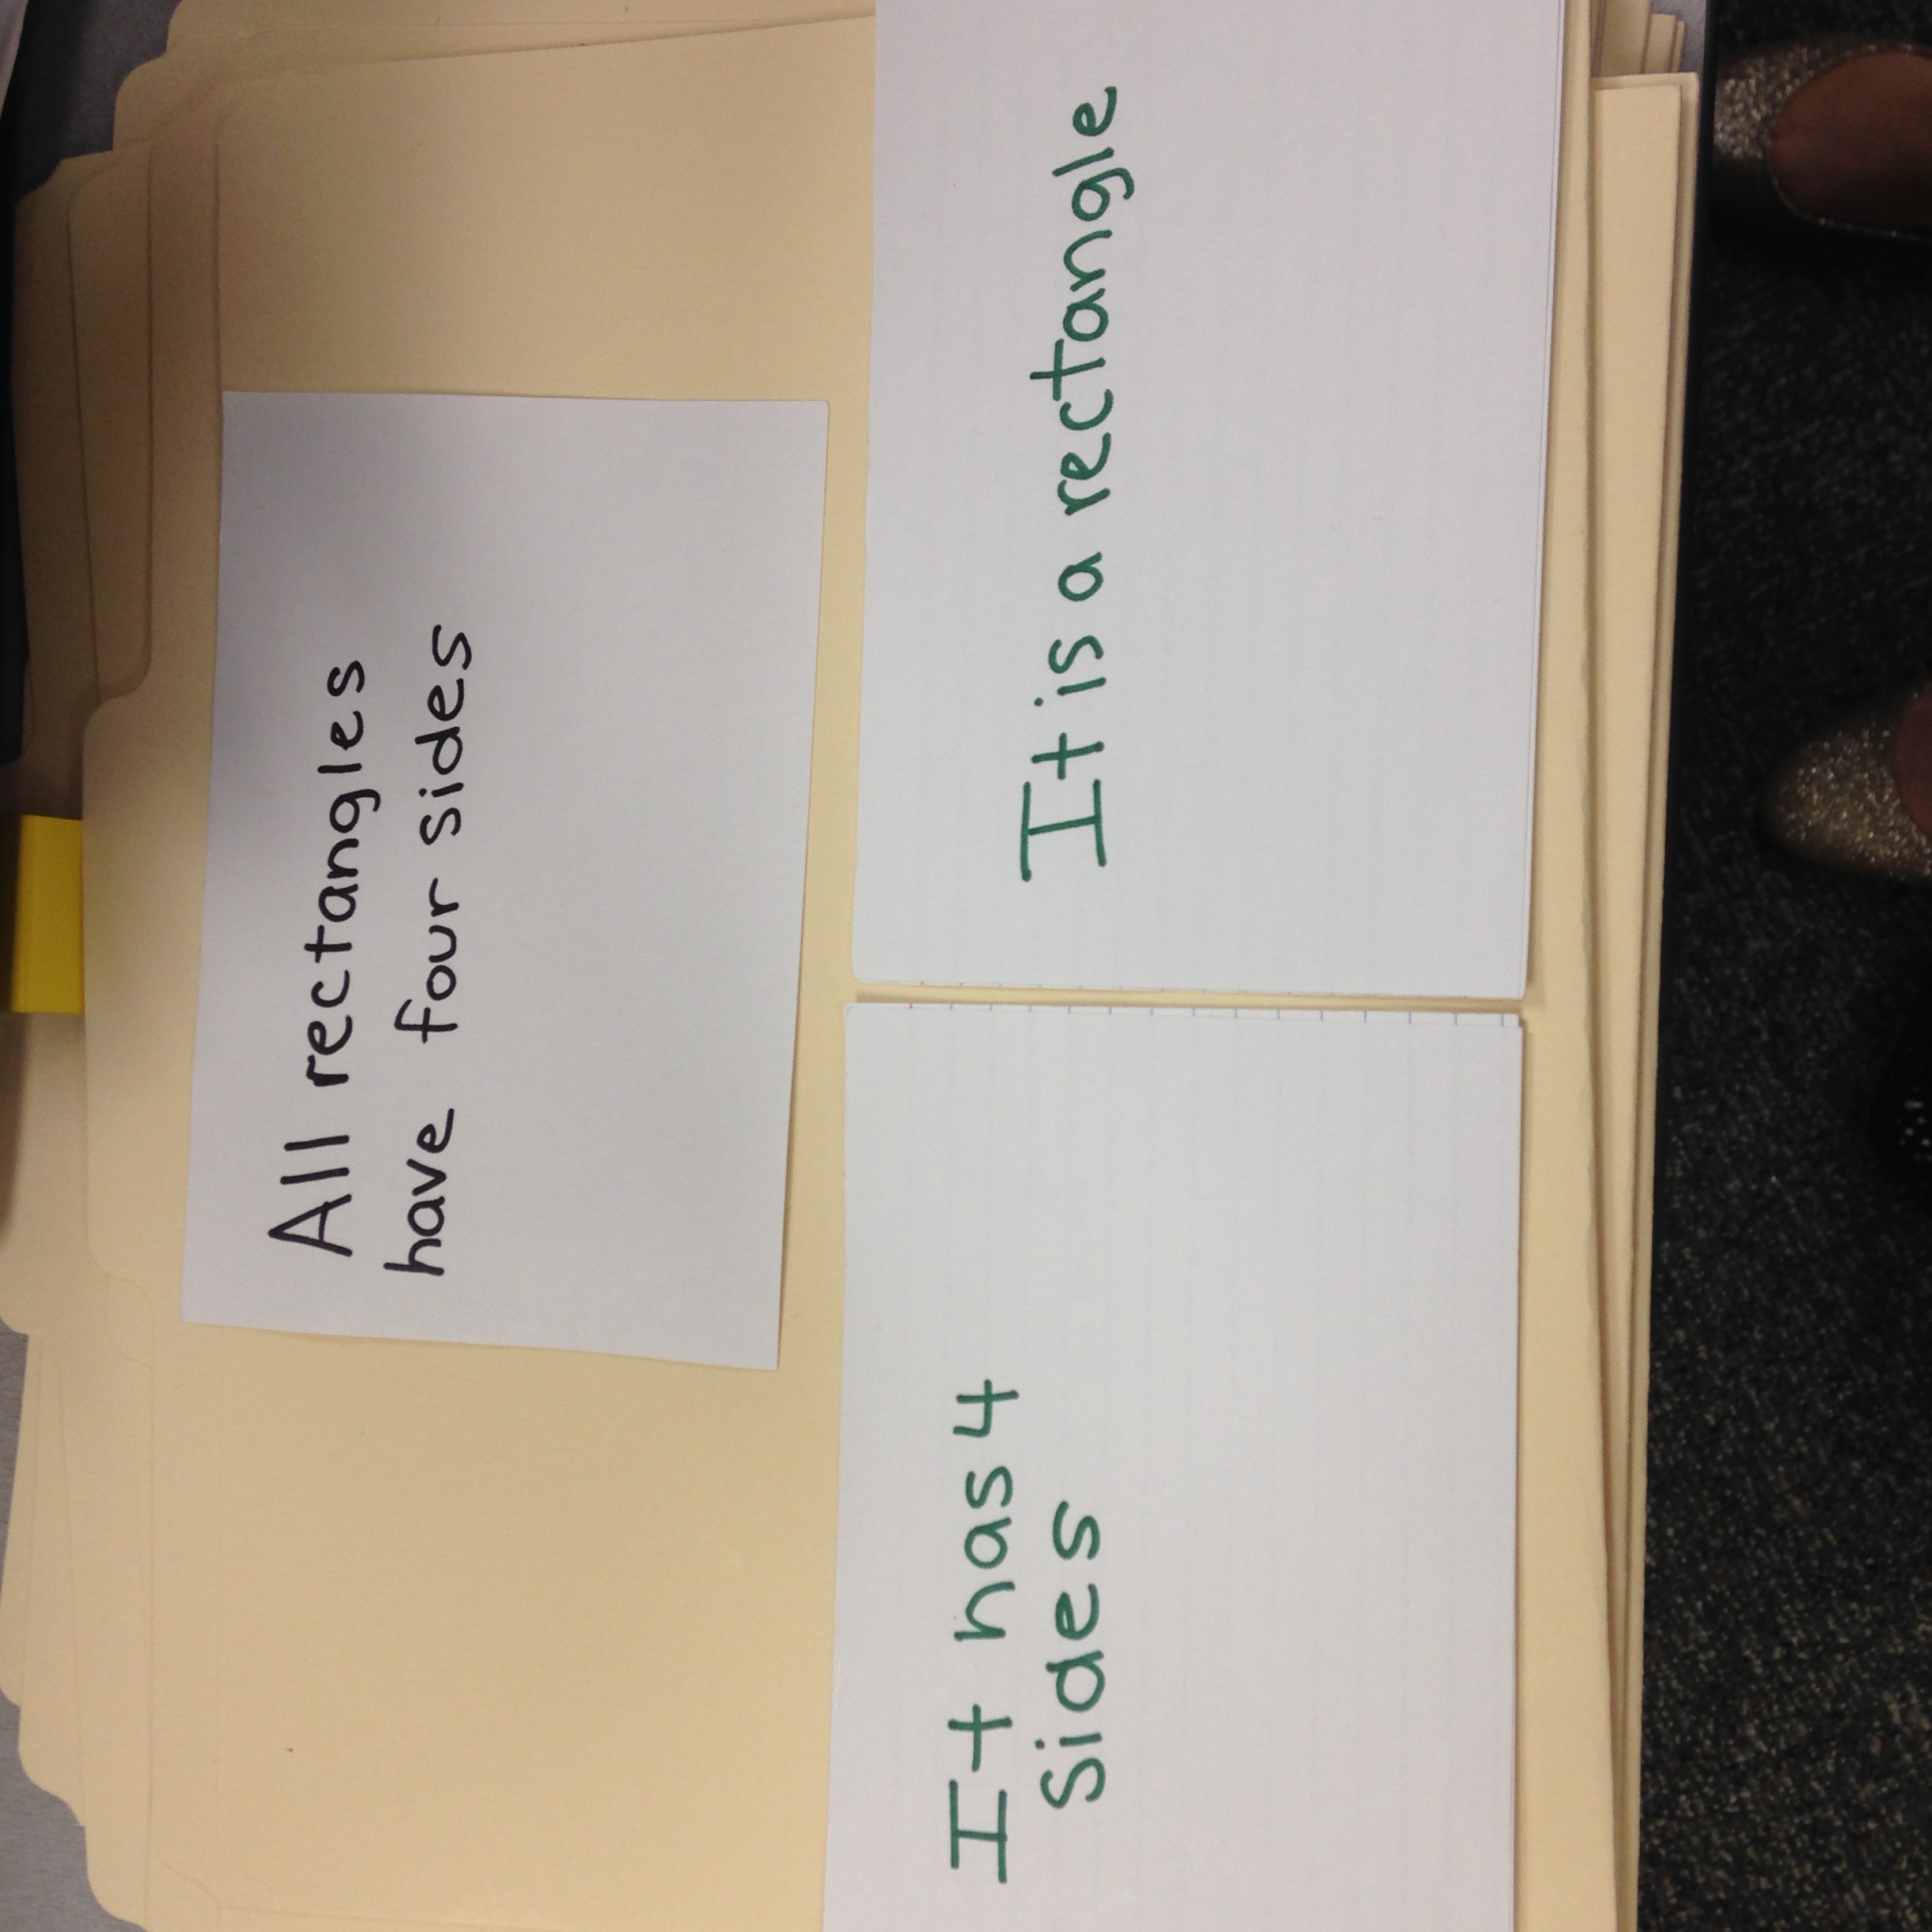
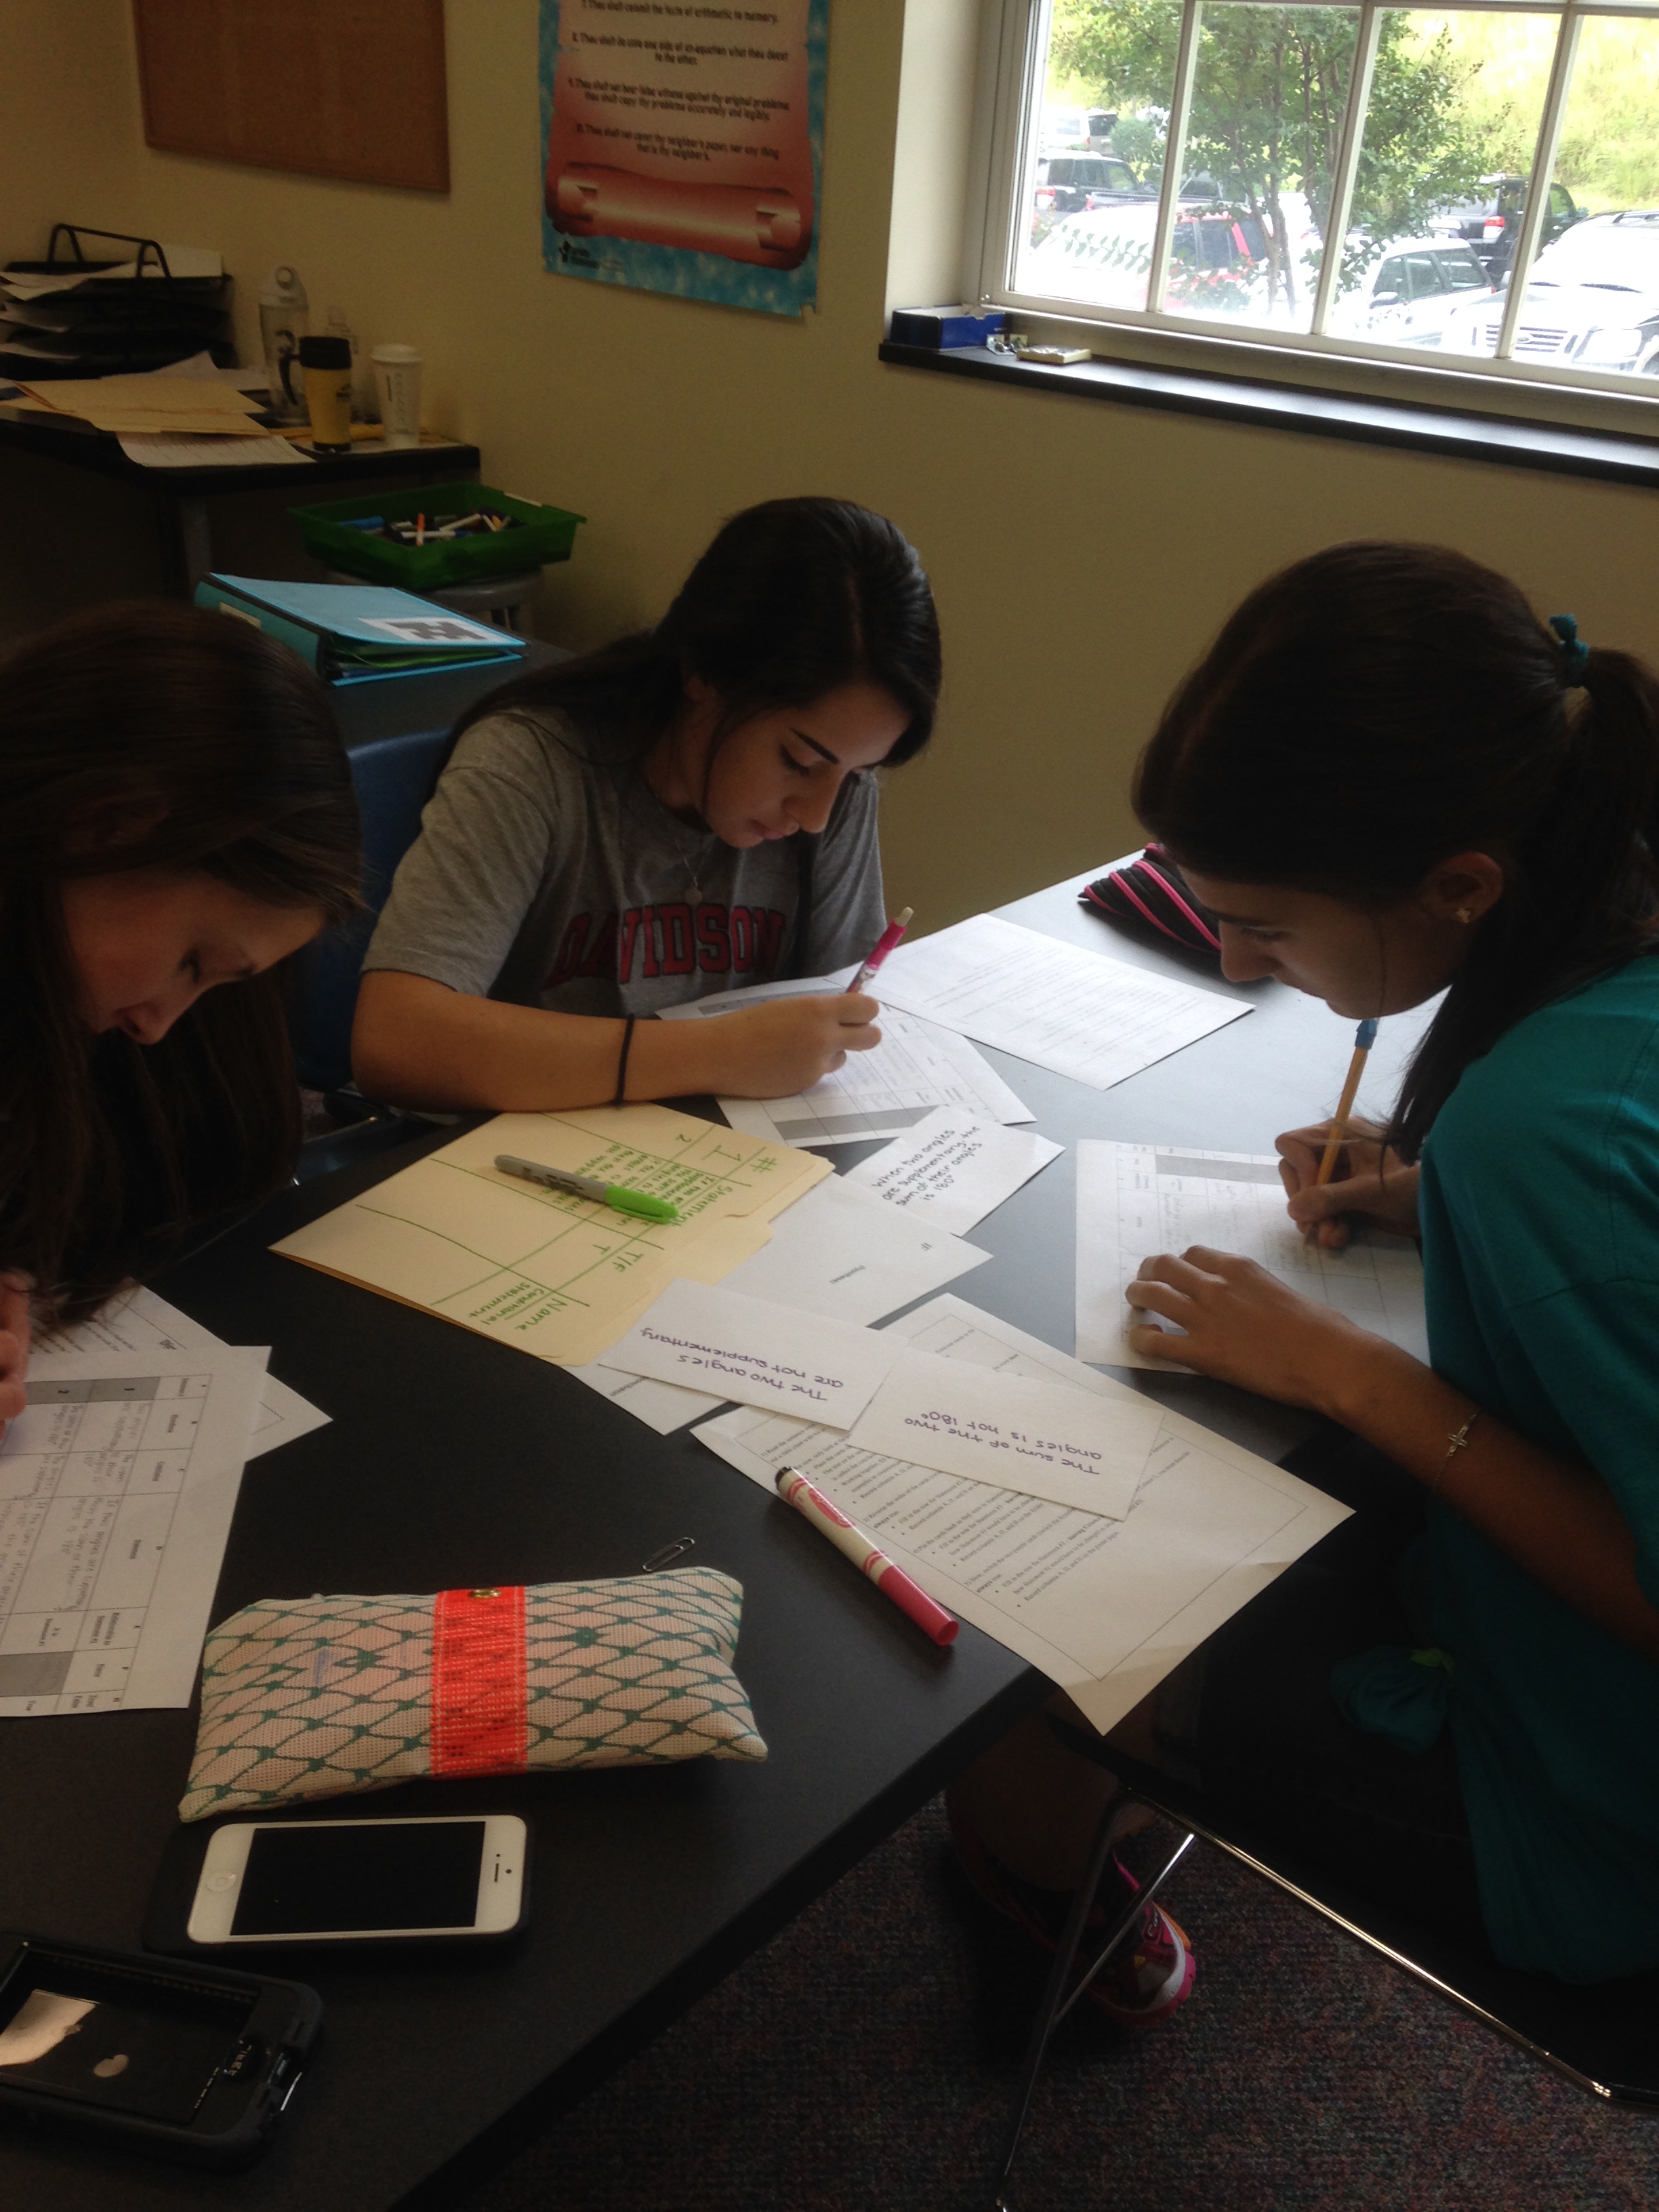
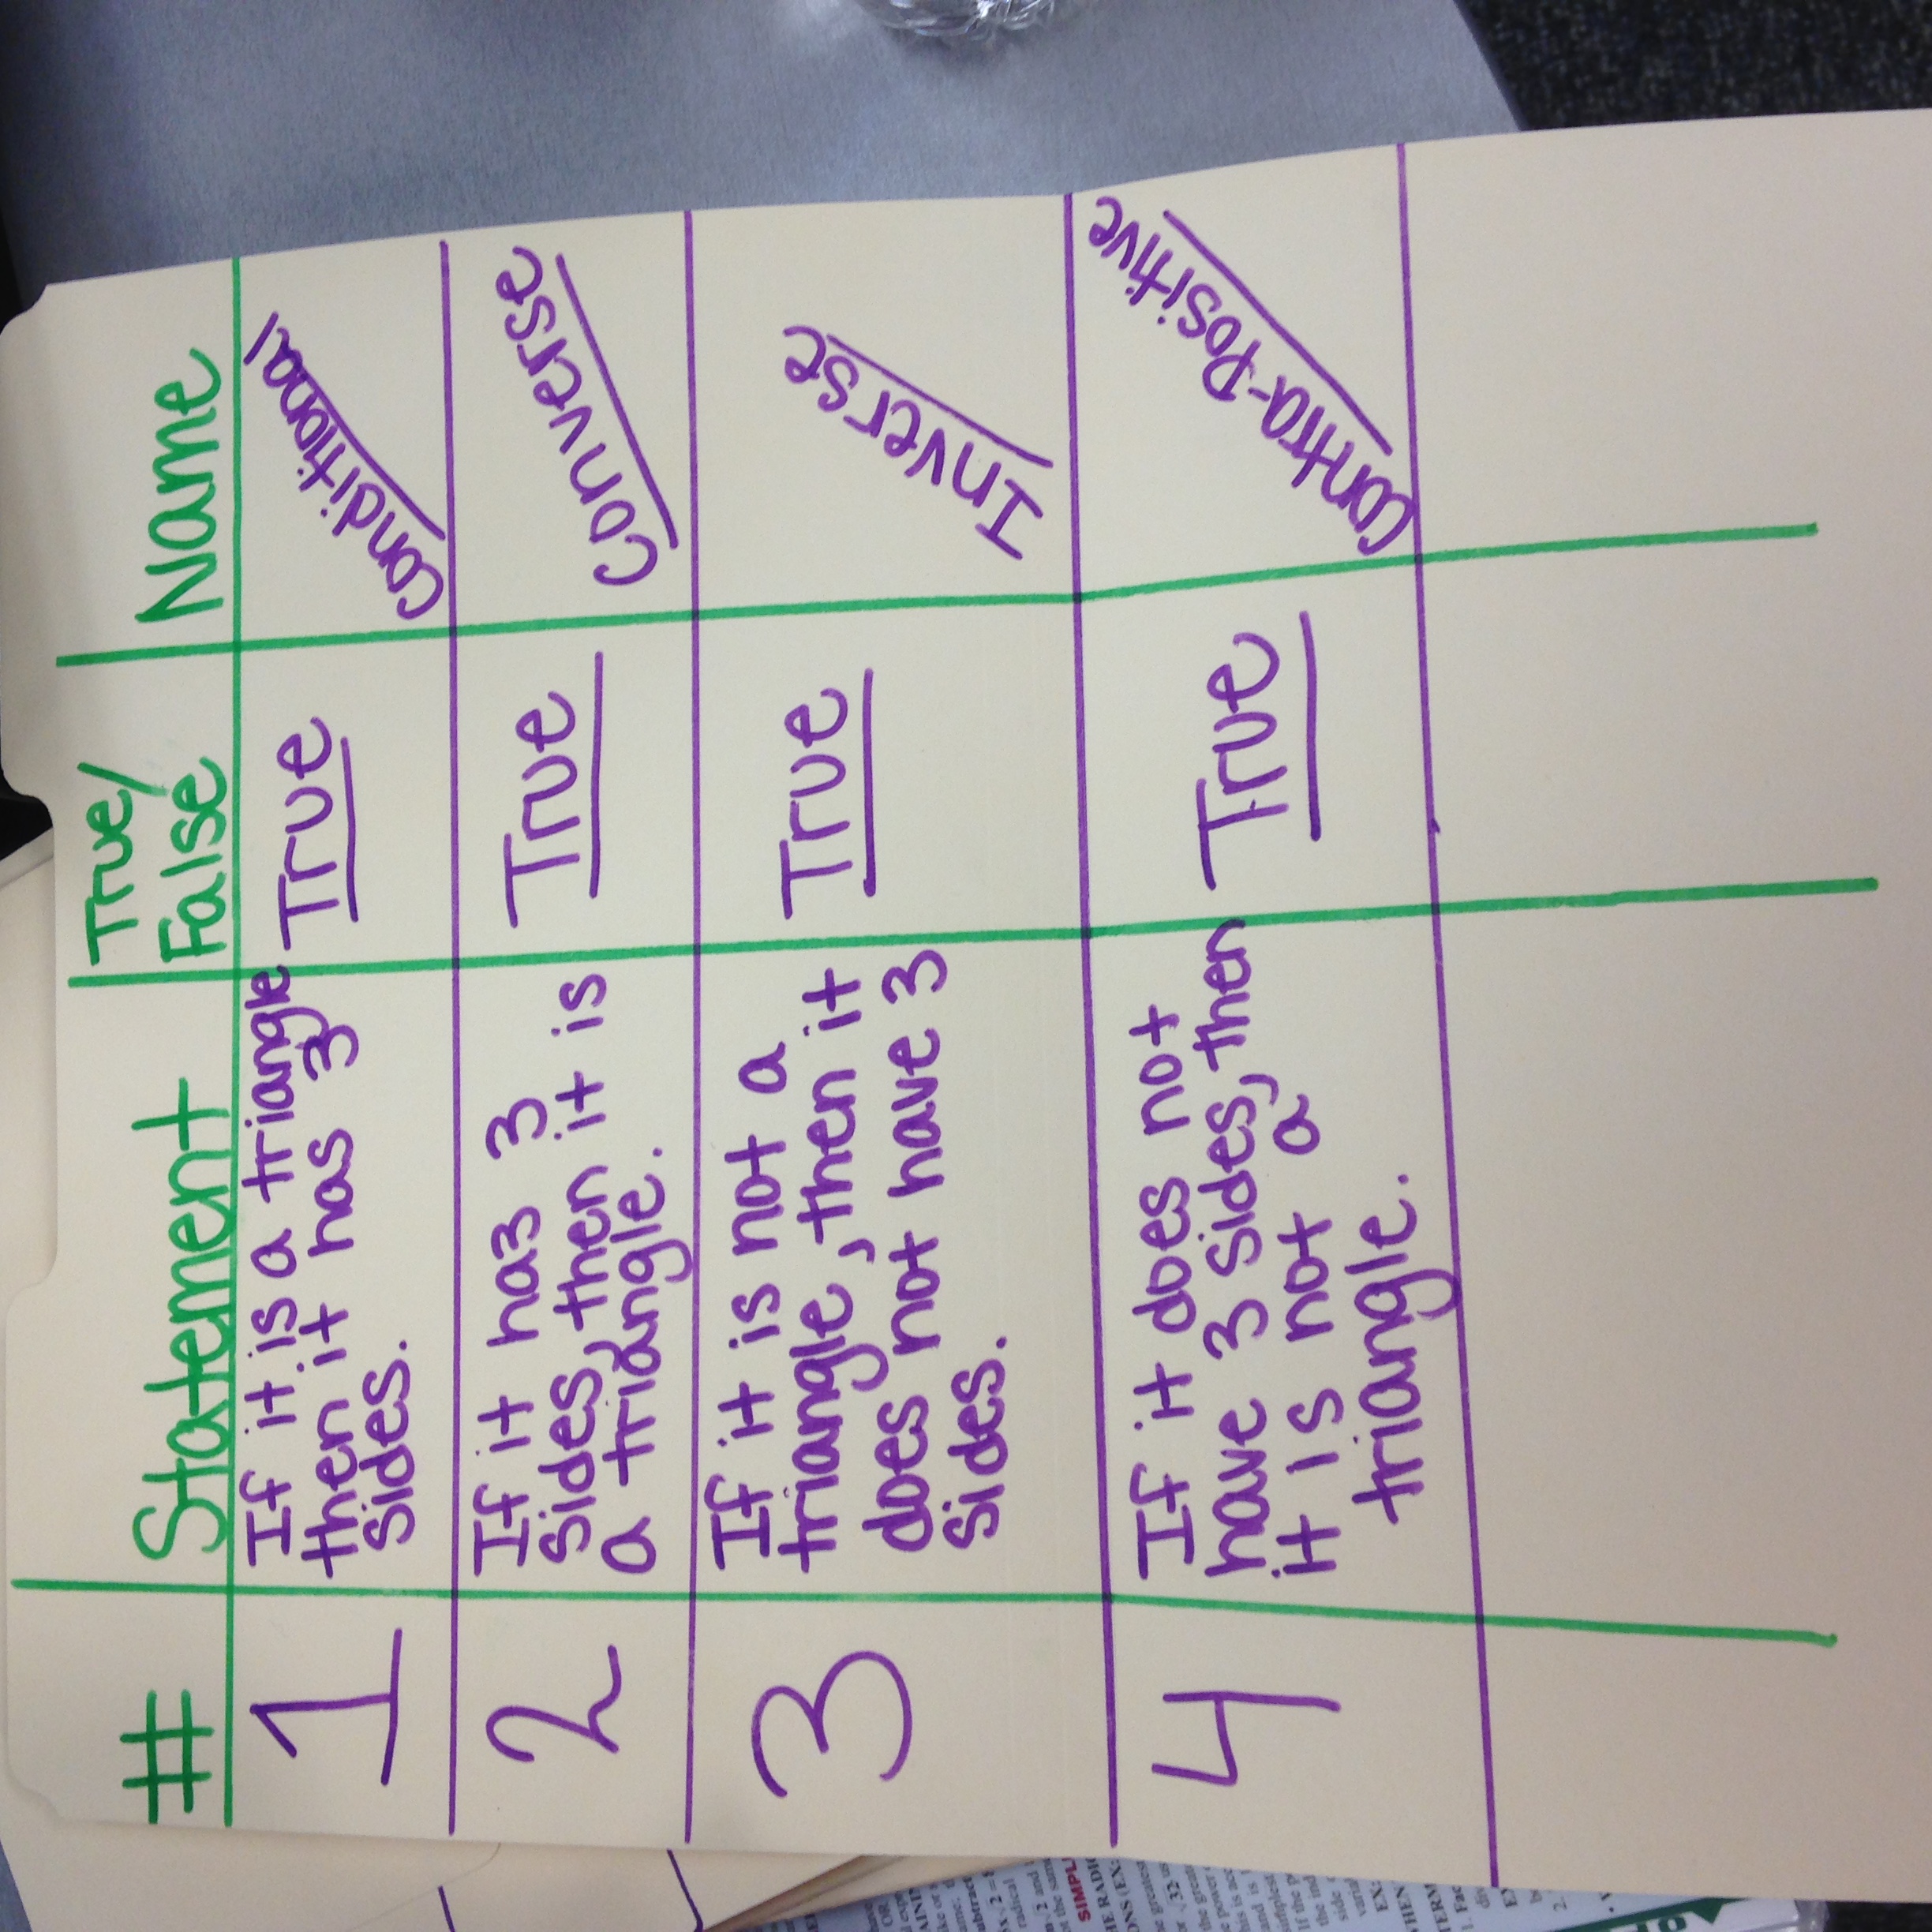
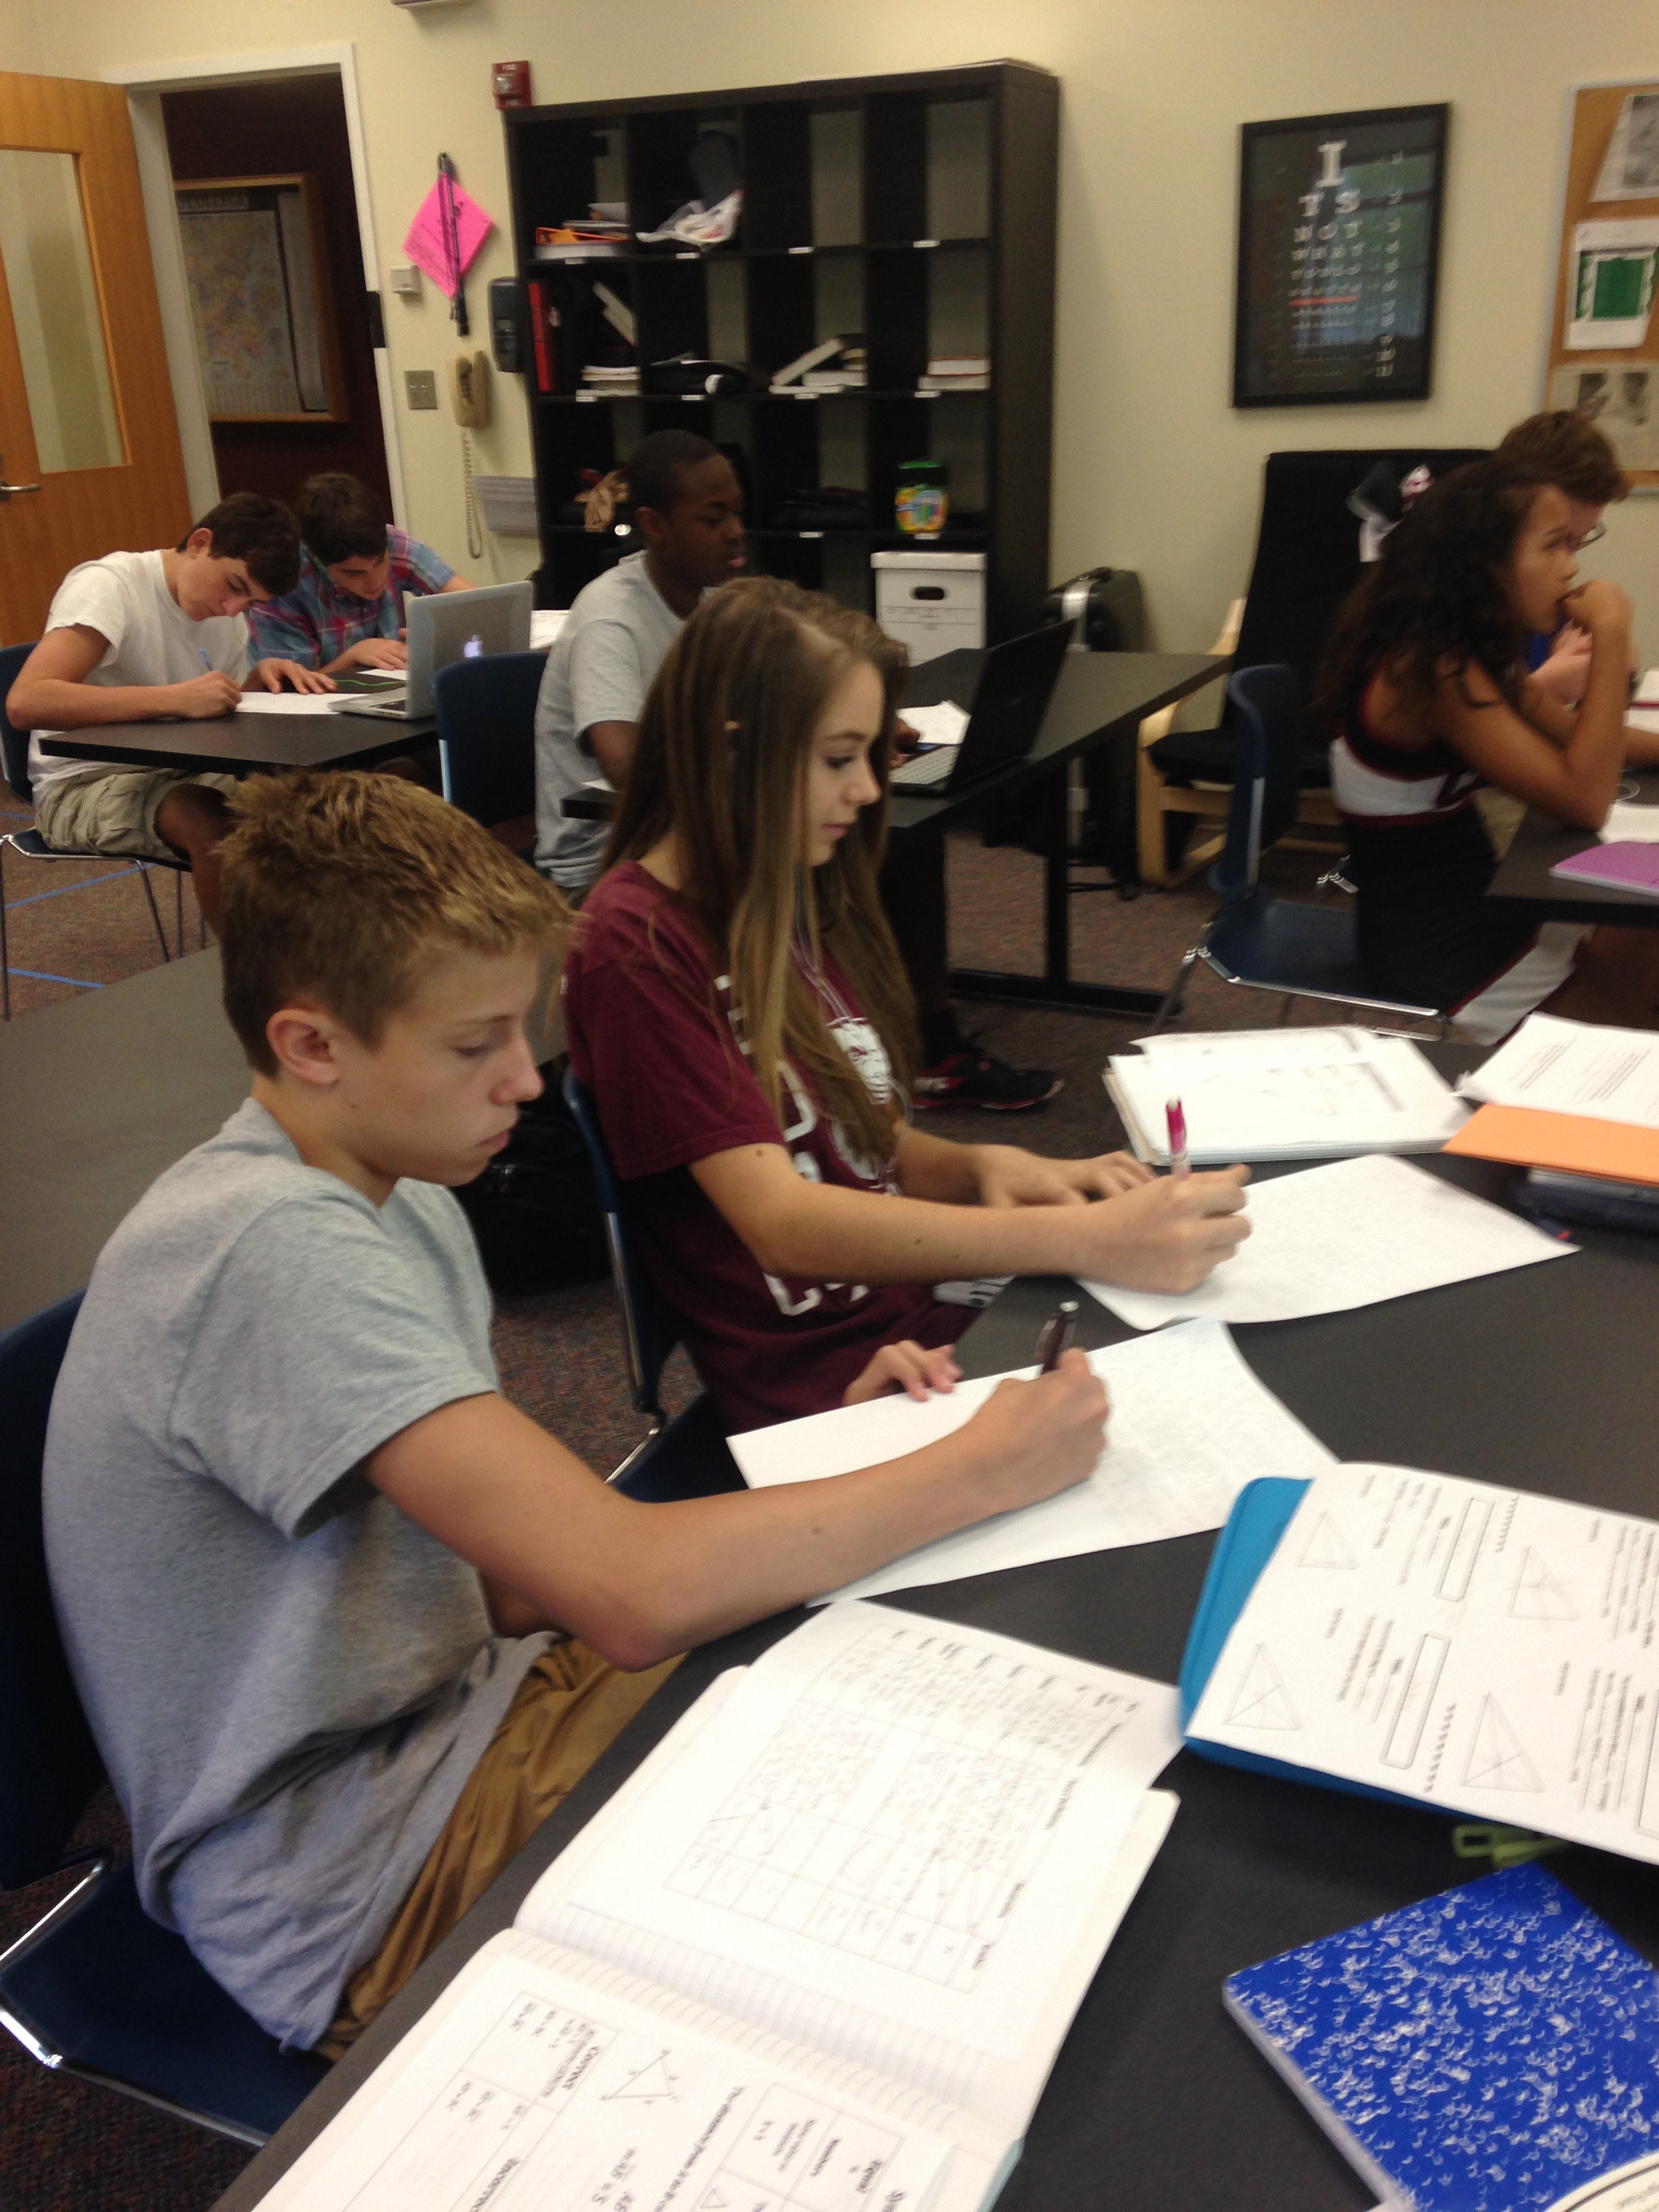
I created three stations, one for each point of concurrency. However, I didn’t write what point of concurrency they were finding. Each sheet started with a part 1. In part 1, students had to find the equations of the sides of triangle, given the three points. No matter what station the student started at they only had to do part 1 ONCE. Students were then given instructions on what I wanted them to do. Each station was a different color and told students to keep track of their colors. When they finished the directions they would scan the QR code and it would take them to a Desmos graph of their specific station. I had the graph organized and labeled and in the order of which they found the information. When students got a difference answer than me this made the process of figuring out where they went wrong. Questions like… did you have the same midpoints, did you have the same slope, are your equations the same… really helped them and myself pinpoint where they were making the most mistakes. Students had to find where the point of concurrency was located in every station and then tell me which point they found. I liked this part because it had them go back and reflect on the process.

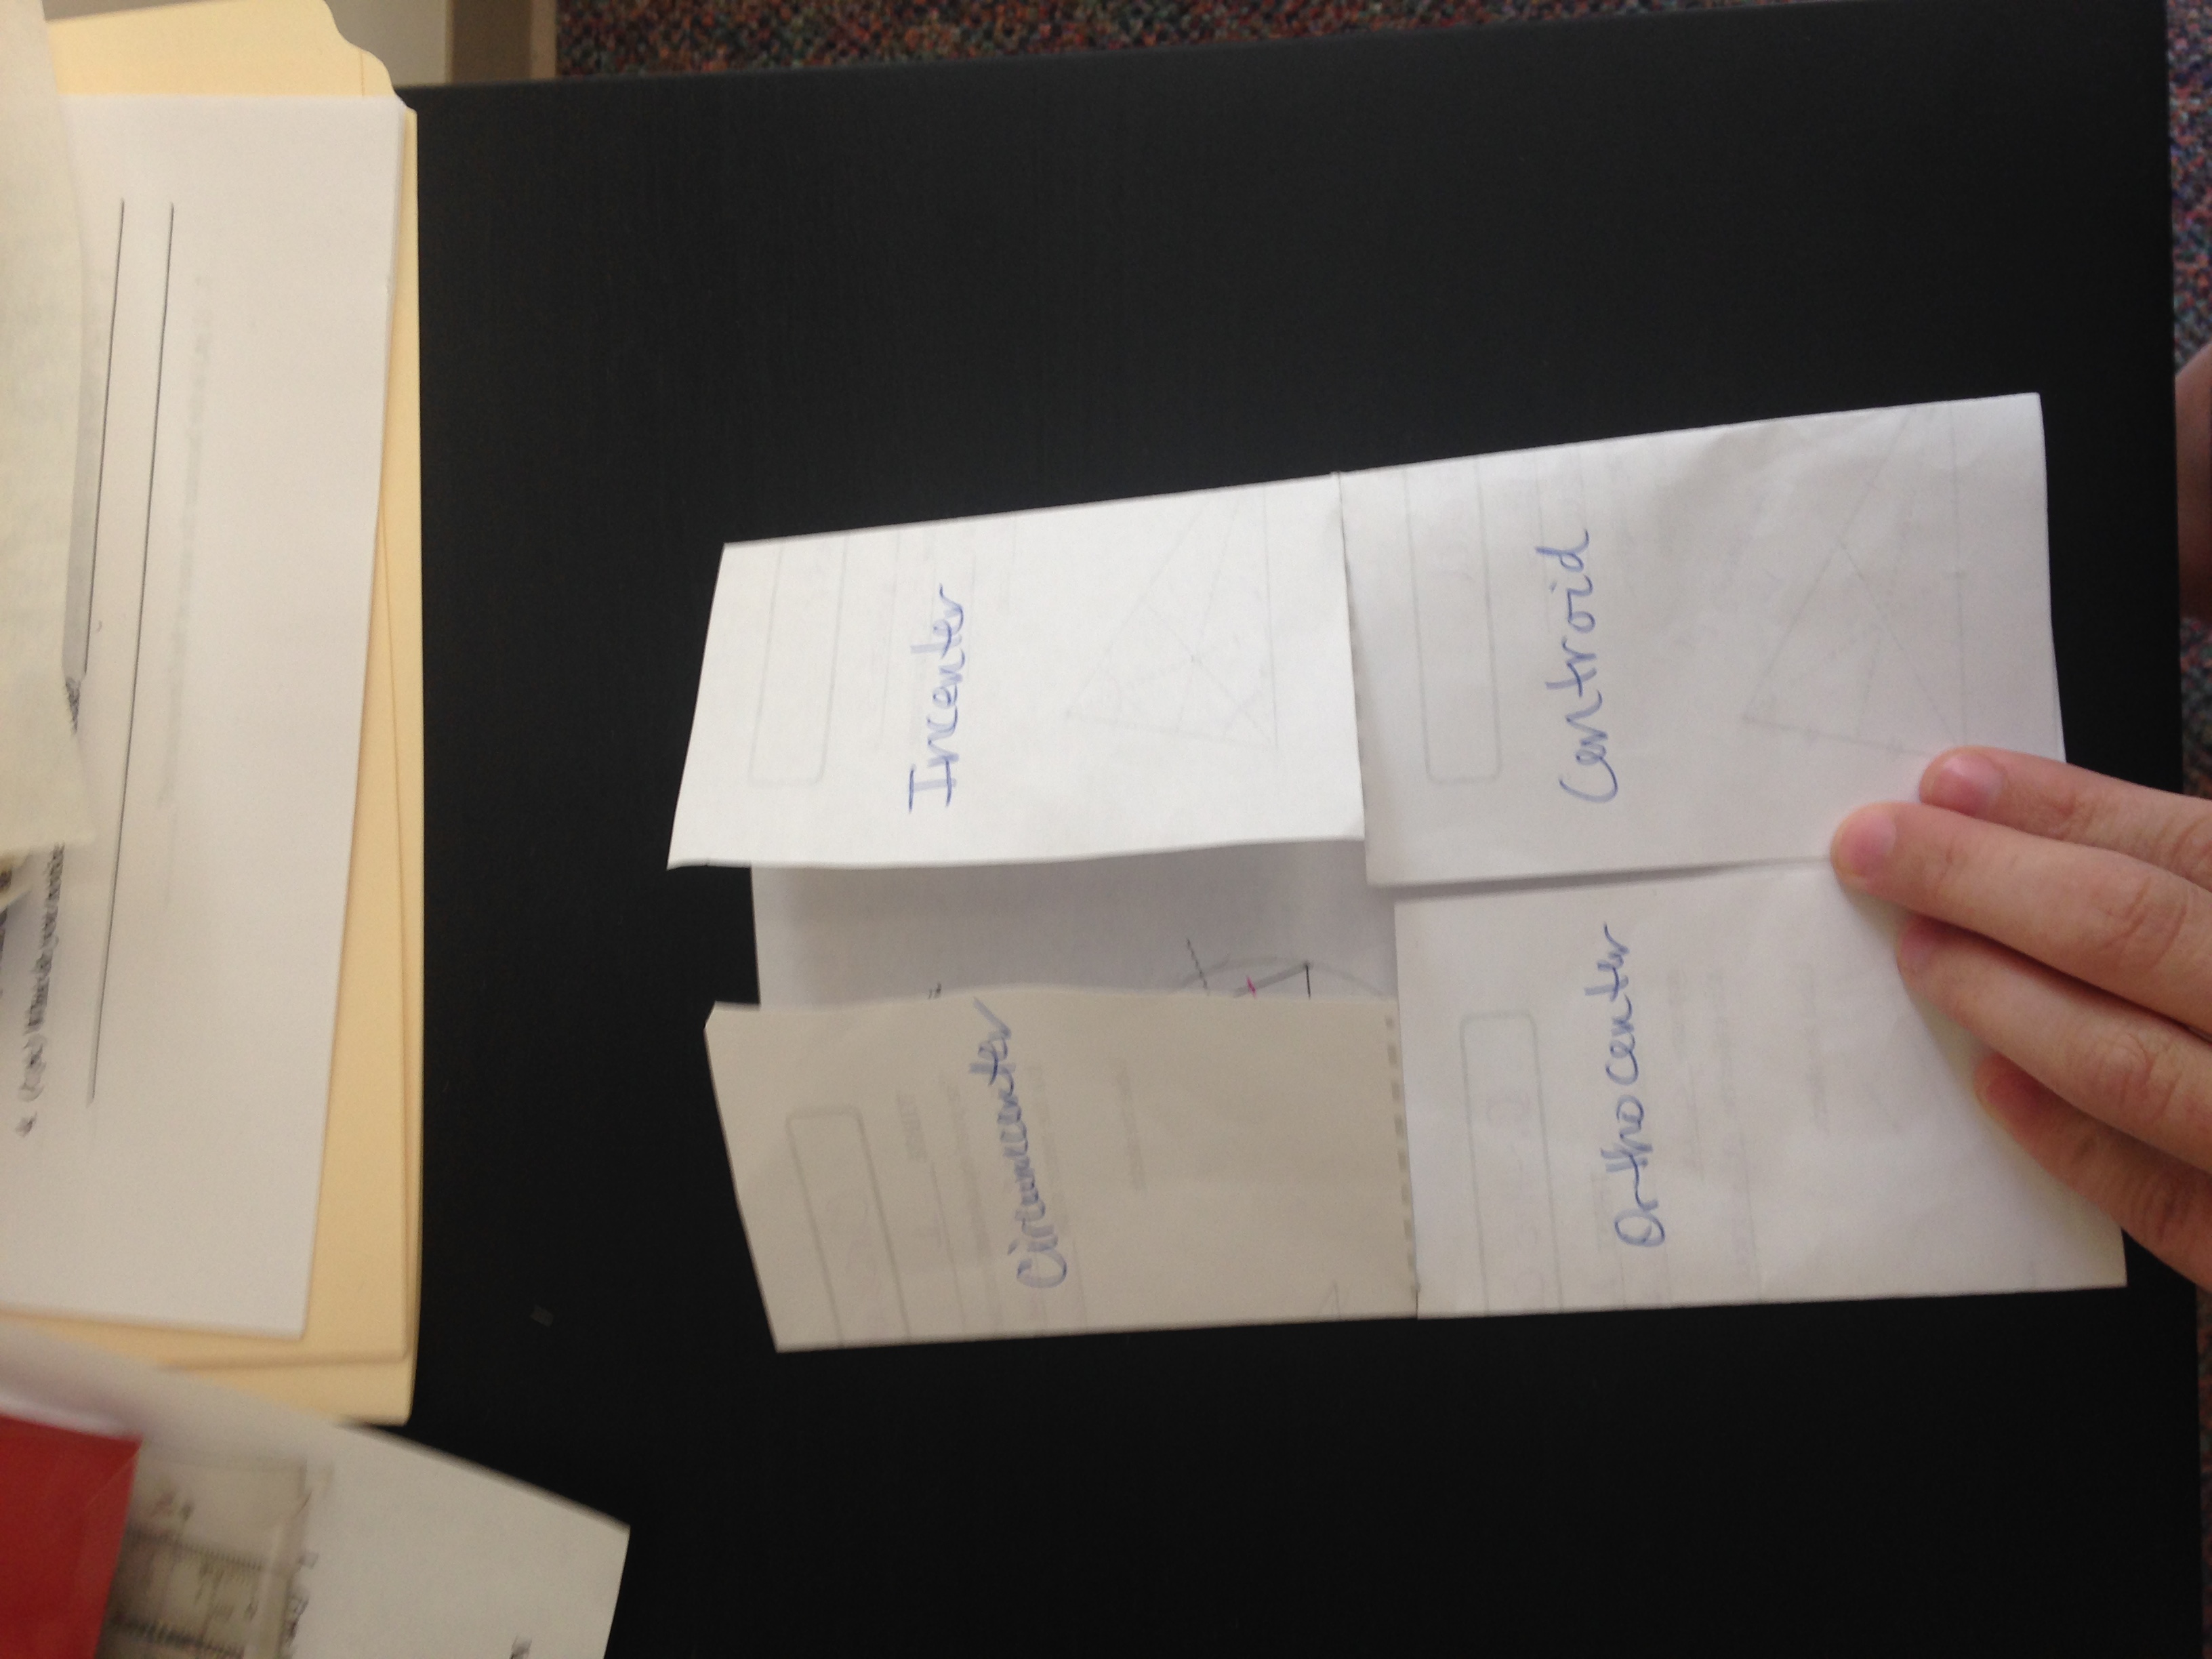
In my first class of the day, I only gave each station the instructions and told them to show their work. For the second class, I made an organizer for each station. Step 1 had its own page because that was the same no matter what station they started at. I asked my students if they felt the organizer was helpful. They told me that it was confusing at first, but they felt that it helped them keep their equations organized and that it was a good tool to help them study. I’m definitely making changes to it for next year, but here it is if you want to check it out!

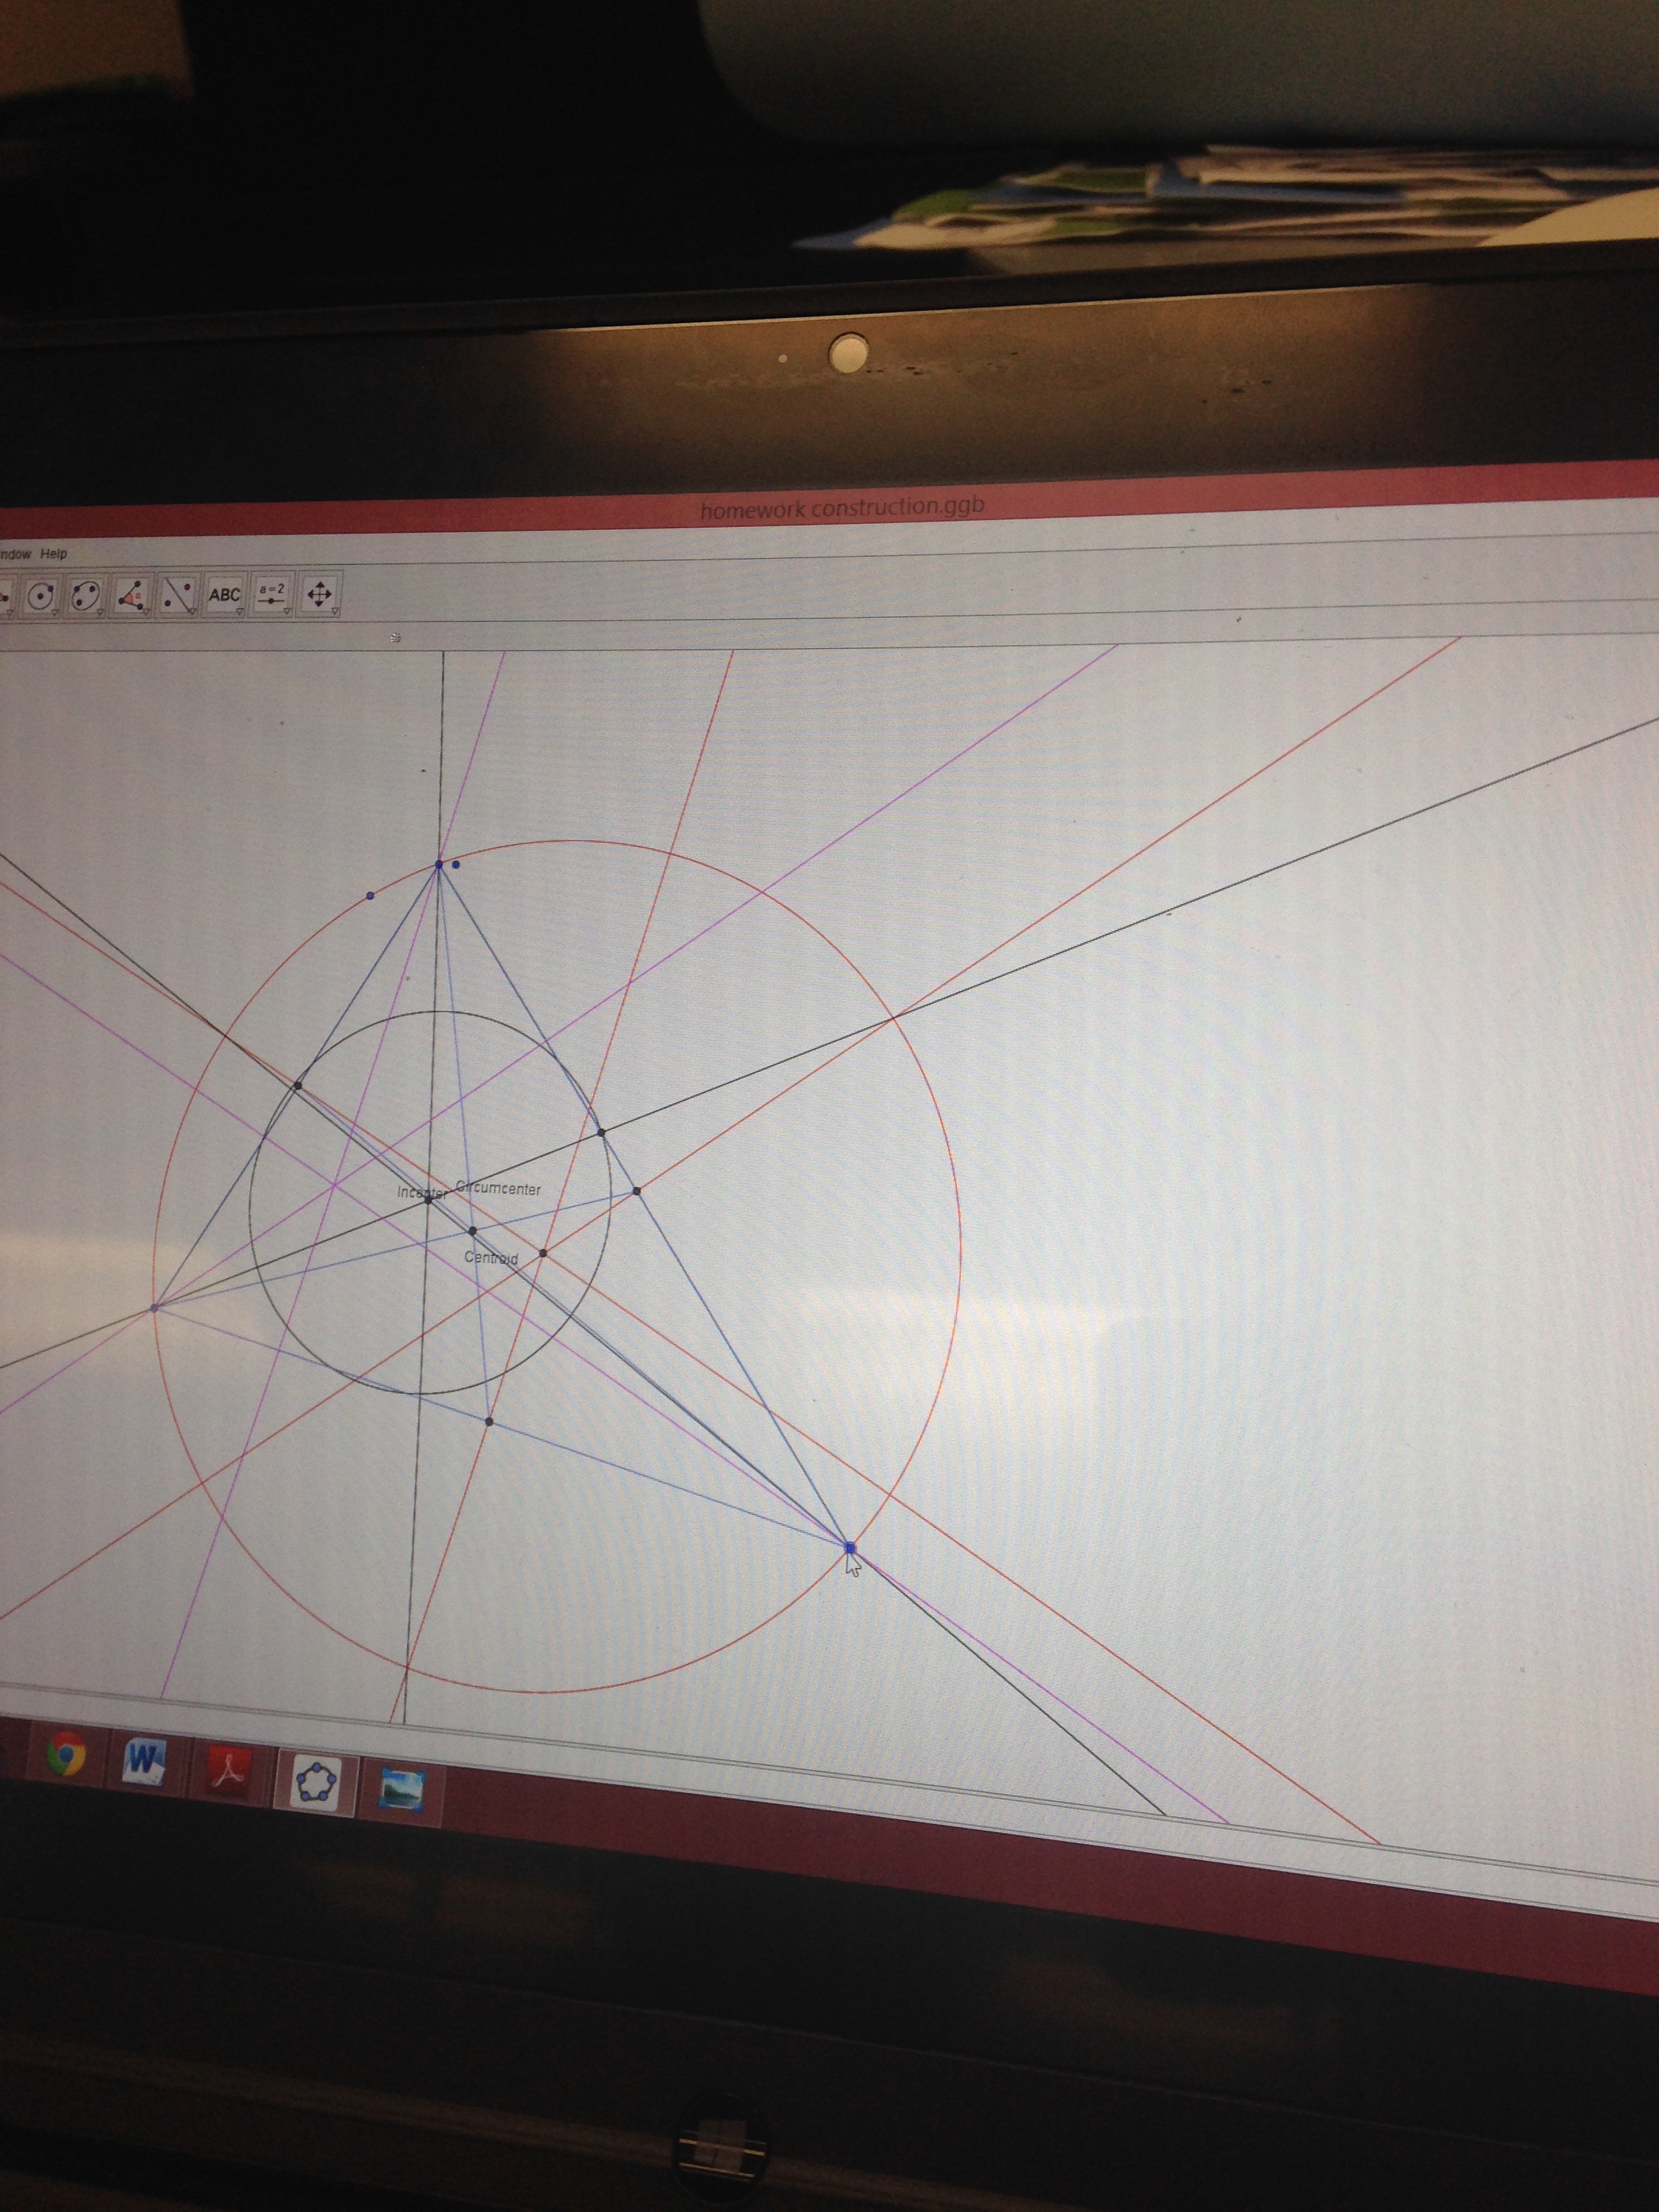
Also here are my Desmos graphs for the circumcenter, orthocenter and centroid answers!


Converse, Inverse, Contrapostive Exploration

Converse, Inverse, Contrapostive Activity from Sam Shah and PCMI

I wanted to introduce Converse, Inverse, and Contrapositive in a way that had students discover what they were before I introduced them to any new vocab.  This activity is aweome!!!

I started out by letting students pick their own  partner. Each group had two small charts, an “if-then” sheet, 1 manilla folder (my Ss actually thought I misprounounced vanilla), two markers, and one directions sheet.  I next walked around and handed each group three cards. Once card had the conditional statement writen in black sharpee. The next card had a hypothesis written on one side in green and the negation of the hypothesis on the other side in purple. The last card had the conclusion written on one side in green and the negation of the conclusion on the other side in purple. I glued together two index cards to create these cards because the sharpee markers bled through the card. I reccomend telling your students NOT to tear the cards or you should lamenate your cards together. Even with this warning I had students trying to seperate the card.

IMG_6051 IMG_6050

Next I had students following directions on the sheet. They had to identify the conclusion and hypothesis for the original statement and correctly order their green cards on the if-then chart. They had to identitfy if the statement was true or false. I then had them switch the order and record what they saw on their small chart (hypothesis, conclusion, what happened compared to conditional, truth value). I then had them put the cards back to where they started and had them turn them over to the purple sides. I had them move them around so they discovered Converse, Inverse, and Contrapositive. I then had them copy their four statements and truth values onto their manilla folder. I also had them make a row for the “name” but told them to leave it blank.

IMG_6023 IMG_6041 IMG_6033 IMG_6029

I gave them 25 minutes to do this. When they finished we came together and filled out a chart together and I introduced them to the names of the things they were doing. I also gave them ways to

Students then passed around their folders to other groups so they could see other examples. I LOVED this activity. I think that it was a great engaging way to introduce Converse, Inverse, and Contrapositive.

IMG_6045 IMG_6042

Brain Dumping… Test Review

It’s finally time for the first test! I wanted to create a review that was more than a practice test or worksheet . We had an long block today ((1hr30min), so I had plenty of time to do a good review. I started class with a 35 minute brain dump. I handed out large blank pieces of computer and told my students to dump their brains on to the paper with everything we’ve done in geometry. I told them to try and write everything down without their notes before turning to them. Some students used different colors and highlighting to organize their dump sheet.

After the 35 minutes I had my students turn to the person next to them. They were supposed to look and talk about their sheets. The purpose of this was to talk about what they wrote and see if their partner had something they may have forgetting. I gave them a quick 5 minutes break after they traded breaks and when they returned to class they had a new piece of paper on their desk.

This sheet was a graphic organizer that I put together. The first section of the sheet were vocabulary words that I expected them to know and recognize. Students then had to define each vocab word and represent it with a picture of symbol. The next section was a list of constructions they should know how to create on geoegebra. I had them create the constructions and explain to me what they did. The last section was all about points of concurrency. In words they had to explain to me how to create each point of concurrency and tell me what happens to the point in different types of triangles. I felt like this sheet was a guide to helps students study, but it wasn’t as direct as a practice test.

I think that I am going to use dump sheets as a review before every test. Not only does it help students organize their notes on to one page, but it also helps students see what they know and don’t know. Another bonus to our brain dumping is that students can save these sheets throughout the year and use them to study for midterms and finals.

IMG_5812 IMG_5813 IMG_5815 IMG_5816 IMG_5824 IMG_5826 IMG_5828 IMG_5831

Points of Concurrency … two days of geogebra exploration

Coming to the end of our construction unit it was finally time to teach points of concurrency. I decided to break this lesson up into two days. The first day was an investigation day to discover the incenter and circumcenter. The second day consisted of a review of the incenter and circumcenter and as a class we discovered orthocenter and centroid.

Day 1: 

My students were given a paper copy of an investigation work sheet in which they had to use geogebra to discovery points of concurrency.  When I passed out the assignment I instructed my students to follow the directions on what to create on Geogebra and then answer the questions on the sheet of paper. They were to work on investigation 1 by themselves and investigation 2 with their partner. Investigation one discovered the incircle and investigation 2 discovered the circumcenter.

Step 1 – Construct three points and connect them to form a triangle: Easy enough. Students also realized that they could use the polygon tool to create a triangle.

Step 2 – Construct the angle bisectors of each angle: This is where things got exciting. For the past two weeks my students have been working on constructions using Geogebra. I know that they are able to bisect angles using the compass tools!!! I didn’t want them to have to go through the process3 of bisecting an angle every single time, so I allowed my students to use the angle bisector tool. This made constructing the incenter so much faster AND much more clear to see. I also told my students to change the color of the lines so they could see what they were trying to intersect. This activity was a clarity that using Geogebra for constructions was the right choice.

Day 2: 

Day two consisted of some note taking. I started out class by passing at a foldable (created by f(t) and modified by I Speak Math)  and having students open a Geogebra worksheet applet that consisted of all of the points of concurrency. I told them not to look at the applet until I said so.

I started out class with a simple question. What does concurrent mean? I had students write down their thoughts in their notebook before sharing with the class. I wanted to go over circumcenter and incenter before moving on, so my next slide started with the question What is a perpendicular bisector? This question helped lead into talking about circumcenter. As a class we were then able to fill in the foldable fill in the blanks about circumcenter. After we filled in the notes I had my students turn to the geogebra applet and only click on circumcenter. I told them to move around the vertices of the triangle and write down what they noticed  about the circumcenter when there were different types of triangles. We then came together as a class and discussed about happened to the circumcenter.

I repeated this same process for incenter, orthocenter, and centroid. It was great because we had structured notes, but students also got to explore the points of concurrency themselves, and share their ideas with the rest of the class.

Here is an attachment to my Smart notebook. 

Screen Shot 2015-09-10 at 4.06.08 PM
First Smartboard slide
Screen Shot 2015-09-10 at 4.02.58 PM
geogebra applet 🙂 SO AMAZING

With about 10 minutes left in class I had my students will out a google form. This form asked students to write down everything they knew about incenter, orthocenter, circumcenter, and centroid. It also had a spot for students to ask questions. This gave me great feedback on what they knew/ understood and gave them a chance to ask questions.

IMG_5809
Closed foldable
My foldable notes from class

For homework I gave out a worksheet in which had students create all of the points of concurrency on one triangle (all the work for each point was in a different color) in order to explore Euler’s Line. Students had to complete this on geogebra. This was great because it had them practicing constructing points of concurrence and also exploring a new concept at the same time.

This is an example of a student exploring Euler's Line
This is an example of a student exploring Euler’s Line
Questions from the form I gave at the end of class

Constructions Mini-Project

We are halfway through our construction until, so I’ve trying to figure out a way to accurately assess my Geometry students on Constructions. Being able to create a construction on Geogebra and actually understand the construction are two completely different things, so I decided to create a mini-project to practice the constructing we’ve done so far. Students were asked to create the following constructions on Geogebra, and provide an explanation on  how you created it, as well as some justification as to why it is an accurate demonstration.

  • Congruent Segments
  • Segment Bisector
  • Angle and 2x Angle
  • Angle Bisectors
  • Perpendicular Lines
  • Perpendicular Bisector
  • Midpoints

I provided a rubric for my students to reference, so they knew exactly what I was looking for. If I gave this project again (and probably will) I would be more specific about what I was looking for with perpendicular lines and would combine segment bisectors with perpendicular bisectors.

I felt like this was a great way to test my students construction knowledge with out giving them a traditional quiz or test. I also gave my students complete autonomy to how they wanted to submit the mini-project.  I told them to “print out their work and creatively submit it”. I did not penalize students for not being extremely creative, however, I gave a small extra credit point for students who went above and beyond (students didn’t know this when they submitted their project). Although some were more creative than others all of the projects submitted were AWESOME! I truly got to see what my students understood about constructions, and my students who strive creatively had a chance to express themselves in a math class. This project also had my students writing mathematically. Three-weeks ago I introduced my students to writing in a math class. It’s insane on how much their mathematical writing has improved in such a short time (complete sentences, vocabulary, accurately expressing concepts in words).

Overall this project was a great way to assess my students knowledge of the past three weeks. Students had a chance to create constructions, mathematically write how and why they are constructing, and creatively express themselves.

Here are directions and rubric for this project if anyone is interested! Below are also a few examples of some of my students projects

IMG_5791IMG_5789IMG_5790IMG_5788

IMG_5787  IMG_5785 IMG_5784

Constructions Using Geogebra

Today in geometry we started our constructions unit. I decided to gear away from paper and pencil straight edge and compass constructions and move towards doing construction on Geogebra. Using a new tool is always stressful especially for 14/15 year olds who already have the stress of starting high school. I decided that the best way to get them used to using Geogebra was by letting them play Euclid the Game. I worked through the tutorial and level 1 with all of the students and then let them start working through the levels by themselves. At first my students were aggravated that I wouldn’t tell them how to complete the constructions. I tell my students that this is called their “productive struggle”. Although aggravating they know that figuring it out themselves will help them be better learners. Some students passed levels faster than others, and as class went on students started working together and helping each other. It was awesome seeing how excited they were getting by doing constructions! Our class was an hour and a half today, so I usually give my students a five minute break to walk around and grab food or drinks. When I told them that we were having a break and then starting something else they said “NOOOOO! Can we keep doing this?!!” I was so happy that they loved the activity so much! It was definitely a great start to constructions.

After our break I passed out a foldable that had instructions on how to create constructions on Geogebra. I also gave them the link to a Youtube Channel that has videos on how to do constructions on Geogebra. For homework students have to practice copying segments and angles on Geogebra.

Overall great way to start constructions and introduce Geogebra!

IMG_5677IMG_5674IMG_5669IMG_5661IMG_5690 IMG_5662IMG_5696