Come work at Cannon School! Deadline for applications is Feb. 17th!
Category: geometry
New Year, New Blog!
I love the MTBoS! Start the year off right by participating in the MTBoS Blogging Initiative for 2017!
Exploring the MathTwitterBlogosphere
Welcome to the Explore the MTBoS 2017 Blogging Initiative!
With the start of a new year, there is no better time to start a new blog! For those of you who have blogs, it is also the perfect time to get inspired to write again!
Please join us to participate in this years blogging initiative! To join, all you need to do is write just one post a week for the next four weeks. To make it easier for you, we will post a new prompt every Sunday! Once you have blogged, please fill out the form below. Each week, your blogs will be posted on this site for all to enjoy!
This Week’s Theme: My Favorites
This week, the blogging theme will be “My Favorites”, where you can post about one (or many) of your favorite things! Called a “My Favorite,” it can be something that makes teaching a specific math…
View original post 430 more words
Triangle Centers Algebraically: Completely Student-Paced Using #Desmos AB
Desmos Activities have completely transformed my classroom. Luckily, my school is “bring your own device” so my students have their computers every day in class..
I introduced triangle centers and how they are created geometrically (day 1) and explored vocabulary with my students as much as possible. After students learned what the centroid, orthocenter, and circumcenter were, I wanted to teach them how to find them algebraically (we talked about incenter, but not in an algebraic way) 
Below are the activities. We did one activity per day. While students were working, I walked around and answered questions all class. Desmos Activity builder really helped differentiate this unit. It also really helped students who were missing school. It was really easy to keep them up to date with what we were doing in class!
The activities below included all three. They became a little less scaffolded each time.
- Finding Points of Concurrency Practice Day 1
- Finding Points of Concurrency Practice Day 2
- Finding Points of Concurrency Practice Day 3
If a student did not finish an activity during class, the activity became homework. For the first three, every student finished in a 55-minute class. The activities with all three took students a little longer to complete.
I gave my assessment for this unit on Desmos AB and had students find the “best location for a water station” between three different fields on our campus. At the end of the assessment, I asked students how they felt they did and if they thought Desmos was helpful to them. Below are a few responses I received.

Teaching Parallel Line Proofs: Student-Paced
This year, I have been trying to make my classes mostly student-paced. It really helps differentiate and allows me to answer questions all class.
I started my unit for Parallel Line proofs by exploring parallel and perpendicular lines algebraically. In my geometry course, we explore the geometric and algebraic aspects of almost every unit.
Day 1 : The Desmos activity I created for this unit explored standard, slope-intercept, and transformation (vertex) form. Students also explored what it means algebraically for lines to be parallel or perpendicular. My students have books/workbooks that I put together for each unit that includes guided notes and homework. This activity followed along with the pages below. At the end of class, we pop-corned around the class and discussed the pros and cons of each form.


Day 2: We started looking at parallel lines geometrically, and the angle relationships formed by parallel lines being cut by a transversal. During this class, I used Peardeck and embedded a Geogebra Activity for students to explore angle relationships. The worksheet that went along with the activity went here. This was a 95-minute class, so once we finished we practiced labeling out dance boards and played dance dance transversal!
Day 3: Parallelogram Mazes. I used this last year too. I love it. It gets students really thinking about angle relationships and how you can “jump” from one angle and end at another. I called it “Parallel Line Land” in class.
Day 4: Now it was time to introduce parallel line proofs. I decided to make this class almost entirely student-paced and create it using Desmos Activity building. I was able to scaffold proof building in this activity. I had students copy the proofs they did on Desmos ALSO in their notes. 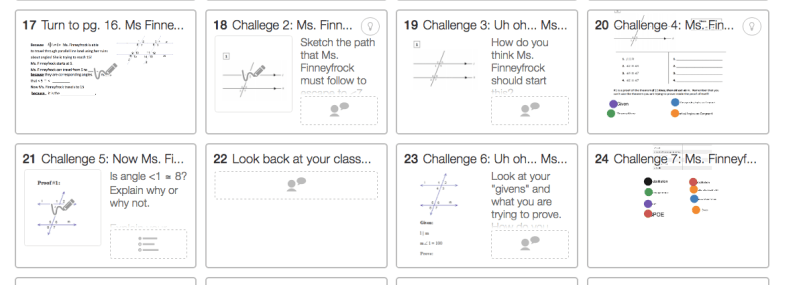
Day 5: Proof practice. Today we used a Desmos Activity and Whiteboarding. This Desmos Activity has student walked through a scaffolded proof of their own, and then they work with their partner on a proof on their whiteboard. I had students walk around and see how/if other groups proved it differently. Students also created their own “parallel Line land” together and decided what they wanted to prove. They then created their own proof.
Day 6: I created a Desmos Activity that walks students through proving lines are parallel. It scaffolded the proof process and goes through all of the converse theorems. I utilized the Desmos Pause button a lot during this activity! It gave us the opportunity for a lot of great discussions!
Day 7/8: Review- On day 7: I gave each student a different proof (there were 10 so I split them up evenly). It was the student’s job to become an expert on the one problem. They had to create a video explaining how they proved it and upload it onto Seesaw. Instead of adding each student’s name to Seesaw, I grouped everything by problem number. Students uploaded their video to whatever number they became an expert at! By the end of the day, each problem had about 4-6 videos. On day 8, students completed all the proofs! They could call over the “expert” for help or watch the videos! It was a great way to help them study for the test!
Socratic Seminar in Geometry!
After attending Mattie and Chris‘ morning session at Twitter Math Camp, I really wanted to try and get students talking more in class. One idea (of many) that really stuck with me was doing a Socratic (Paideia) Seminar in my geometry class. After talking to Mattie at lunch, I decided that doing it as an introduction to proofs was a great place for it.
Geometry is typically taught using two-column proofs. However, I wanted my students to be knowledgeable about all formats of proofs and make the decision for themselves. Every format speaks to students differently, so I wanted to give them the autonomy to decide.
Every unit, my students receive a new booklet from me. This booklet includes all of the material they need for the unit and acts as their textbook. The first activity for this unit was proof exploration. Students had to examine two-column proofs, paragraph proofs, and flow-chart proofs (these were given to them) and find one other source about proofs. In order to prepare for the seminar, students had show they activity read.
Ways to show you actively read:
- Highlight
- Notes in the margins
- Questions in the margins
- Answer all questions
Students filled out the pages below before coming to class for the seminar. If you are interested in seeing the entire booklet, it can be found here. unit-3-introduction-to-proofs
When students arrived to class, I had the class organized in two circles. The outer circle had tables and the inner circle only had chairs. I assigned students their “circles” and then asked them to take out their notebooks and computers.
The inner circle could use only their notebooks during the seminar. The outer circle would be on their computers. I used PowerSchool for students to “backchannel” during the seminar. On this “backchannel” students could engage in conversation with the rest of outer circle about the conversation going on in the middle circle. They could also talk about anything else as long it revolved around the subject. Many students chose to answer the questions being asked to the inner circle, and agreeing or disagreeing with comments being made.
Before we started, we went over the rules for each circle.


It was amazing how much students were talking and engaged in the activity. I heard very insightful comments from all ranges of students. A lot of my students actually asked for deeper questions for next time (I went easy on them). They said they had a deeper understanding of parts of proofs and why different parts needed to be included. They all also picked their favorite style of proof which they are allowed to use the entire year.
We look turns switching the circles as well! Below are some the questions that my students were asked. I did not reach the questions out loud. I just added a question when signaled by the students.
A video of part of our seminar can be found here!
More than a Worksheet… with Desmos!
Typically, I use Desmos Activities at the beginning or end of a lesson. I have found it as a great tool to introduce or wrap up a class. However, recently I have been using activity builder more in my classroom every day. A new thing I have been doing is pairing Desmos Activites with worksheets.
Pros of pairing them together
- Students are writing more!
- After students complete one problem on their sheet, they follow along with the Desmos Activity until they are told to stop and move to the next problem.
- Problems go more in depth after they solve it on their paper. Students are asked to explain their answers.
- Students can check their answers.
- Instead of being called over to ask if “they did it right” students can check their answers on their own and move at their own pace.
- Students can also compare their answers with other students all around the room
- You know how ALL of your students are doing at all times
- You can see if they are doing it correctly all in one place. I’ll walk around with my iPad as I help students.
- If you realize that a lot of students are struggling with a certain problem you can put the activity on teacher mode and talk about it as a class.
- You get immediate Feedback!
- This is a great space to give an “exit ticket”, see where students are, and how you can help them!
Here is an example of a worksheet and the Desmos Activity that goes along with it about graphing and solving systems of equations.
This example is practice graphing systems of equations: Worksheet & Desmos Activity.

Logic Story Books
Students tend to struggle with symbolic logic. It’s hard for them to see the order of the logical statements and the reasons behind it. They want to use the inverse or converse to prove something because it’s there. I feel like it’s hard for them to visualize why they can’t do it with symbols until they see why it doesn’t work elsewhere.
We had some time after a quiz on a long block day (85-minute class), and I decided to let their creative side show.
I asked the students to create a children’s book using logic statements.
- They needed at least 10 statements
- Create a story with fluidity by using the transitive property, contrapositive, and conditional of the statement at least once ( & identify when they used what)
- I gave the students the story “If you give a Mouse a Cookie” as an example
This really helped especially with creative transitive statements. For some reason, they seem to struggle with identifying transitive statements when creating proofs.
I let students decide how they wanted to create the story. Some students created theirs on paper while others created it on power point, pages, or google docs. I wanted everyone to see the other stories, however, class time didn’t allow that.
I decided to utilize the wiki feature on Haiku, and I set up a wiki assignment where every student uploaded their story. For homework, student’s had to comment on at least 4 other stories from any of the three geometry classes. This has the same effect as a gallery walk with post-it notes, but it’s now archived on their Haiku. This was a fun activity that didn’t take up too much time. Students really enjoyed creating stories!


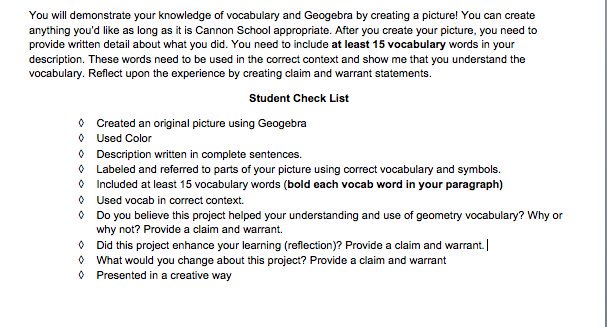
Create a Picture: Exploring Vocab and Geogebra
I love projects. From my observations last year, students seemed to get a lot out of applying their knowledge instead of taking a formal written assessment. After learning basic geometry vocabulary and briefly playing around with Geogebra for constructions, I created an art project for students to show me what they know.
Feedback I received:
- 15 words is a lot (agreed)
- Some students said they would have liked it better if they didn’t have to use GeoGebra. Part of the assignment is learning the software, so that part is staying for next year.
- Most students said that creating their pictures and having to write about what they did using the vocabulary really helped them visualize the vocab and apply it, instead of just memorizing
I also gave a quiz on the vocab after this project. Although this way a graded project, it was used as a way to enhance their learning, not just assess it. Below are some of the amazing projects I received. My students are so creative!!! I also had my students do a gallery walk (each received 4 sticky notes but they asked for more) when the project was due. This gave them a chance to see other people in their classes work and made everyone feel good about their work 🙂
Week 1: Creating a Culture of Math Discussions and Debates
Starting my second year of teaching.Thankfully, I had one prep that didn’t change, Geometry! I’m finally out of the “holding my head up right above the water so I don’t drown” year and am finally truly changing and analyzing my classes. This year I decided to have two main goals.
- I want my students to speak and debate mathematically
- I want my students to write mathematically
For this post, I’m going to focus on goal #1. In my first week back, I created more mathematical discussion than I had the entire previous year.
At Twitter Math Camp this summer, I went to a morning session with Mattie Baker and Chris Luzniak about creating a culture of mathematical discussion and debate. One of the many ways to do this was to set up a classroom environment is which students use the format
My claim is____________. My warrant is _____________ to express and justify their ideas.
I started using this format on the first day of class. I started asking fun questions like “what’s your favorite movie?” “where’s your favorite vacation spot” and some “would you rather” questions. This was a great way to help students become comfortable with the format, get comfortable with each other, and helped me learn their names very quickly. We continued with these same type of questions on day two.
Next, I started asking more mathematical questions, specifically for vocab that they were supposed to look up the night before for homework. I called on two or three students per vocab word to hear their opinions. If there was a controversial word, I asked more students for their thoughts. This was a great way to go over and discuss vocab in an interactive way. I could also see what misconceptions they had of certain words.


Then I used this to explore a topic that we hadn’t really focused on yet. For homework, I had students look up the definition of congruent and equal and compare them. When they submitted their responses I could tell that there were misconceptions. Students also didn’t know when to use equal versus congruent. I decided to start the class with some claims and warrants. The entire class became involved in the discussion on where = or congruent belongs and WHY it belongs there.


I have also used this to discuss a topic that we learned the day before. Chris had a great activity debating if the best method of finding distance is the Pythagorean theorem or the distance formula (depending on the information given). I let students work through the three distance problems but also provide a claim and warrant for why they chose that method. At the end of class, we shared our claim and warrants as a class.
I’ve really enjoyed implementing claim and warrants into my class so far. I can’t wait to try (and blog) once I try other things from this session!
Day 0: #DESCON16.
As if going to my first Twitter Math Camp wasn’t enough, I also got to attend an entire day of Desmos! I just finished my first year of teaching and Desmos has been a staple in all of my classes. To the say the least, I was VERY excited.
The day started with breakfast and a video message from Eli from Germany. Then the Desmos team started showing us some awesome new Desmos Graph features and a Desmos Potluck. One of the newest features makes Desmos accessibility for blind and low-vision studends. Pressing command F5 turns on the sound narrator which will allow Desmos to audibly describe your graph. You can also HEAR what your graph sounds like! During a session, a group of teachers worked together to create a graphical representation of “Mary had a Little Lamb” https://www.desmos.com/calculator/xdz17jn1rw SO COOL. This new feature is not only amazing for the low-vision students, but also opens up so many opportunities for interdisciplinary projects in Desmos!
During the day, we broke into groups and participated in a Desmos Graph scavenger hunt. During this scavenger hunt, I learned about another great Desmos feature http://learn.desmos.com/. This site provides interactive instructional activities on how to use different features on Desmos. I definitely had fun playing around with polar graphing!
Lunch time! (thanks Desmos!).
Then we got to hear from our first keynote speaking. Sara VanDerWerf. She was encouraging us to be “evangelists”!
Now for the best part: The Desmos team introduced two new features to the activity builder.
- Bundles: Desmos has taken a bunch of activities and “bundled” them into topics. These bundles are not only a bunch of content similar activities bundled together. The bundles also provides key understandings and suggest the order in which the activities should be played! This is an example of a Functions Bundle.

- Create your own cardsorts and marbleslides: HALLELUJAH! They now let you make your own marbleslides and card sorts! No more laminating, cutting, missing cards to do card sorting in class! It’s amazing! I made my first one on sorting different types of quadratic equations. We also created a collection of our card sorts! To activate the feature, just click on your name in the top right, then go to labs, and enable them.


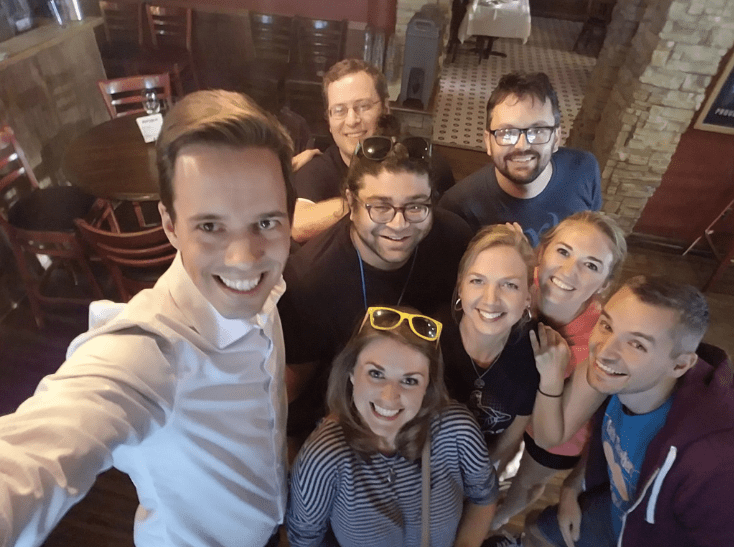
After a day of Desmos fun, the Desmos team then took us out for Happy Hour!!! Thanks Dan, Christopher, Michael and the whole Desmos crew for a great day! And Obviously, we had to take a selfie with Dan Meyer!