The Desmos Ladder! – Tracking Team Progression

This year we have started using the CPM curriculum for geometry and algebra 2. Students are constantly working in their teams to problem solve and typically are on different problems at different times. Keeping track of where each team is can be difficult especially when you have a large number of teams.  Creating a problem ladder is a great to tool to help regulate their progression.

Typically, I would write their problems on the board and they would move their group’s magnet to the problem they are working on. When they finish a problem they “red light” me and then they get approval to prove on the ladder. It gives me an idea of where every group is and if a group is slacking or moving too fast through the problems. It also gives the students a good sense of where they are.

I decided to make the switch from writing the ladder on the board every day to creating a ladder on Desmos. Teams are now able to create their own team names and come up to the board to move their team along. The ladder really helps to regulate a collaborative classroom. Here is a template for creating your own Desmos Ladder for your classroom! 

Screen Shot 2018-03-08 at 7.03.15 AM.png

Weekend Getaway: Desmos Fellows Weekend

Earlier this year, I was lucky enough to be selected as a Desmos Fellow.  This entailed going to the Desmos head quarters in San Fransisco and meeting up with some of the most amazing minds math education for a weekend. I was so ecstatic to be going to Desmos, not visiting San Fransisco (a city I’ve never been to and did very little sight seeing while there) but Desmos.

My adventure to Desmos started Friday morning with my flight out of Charlotte.  Julie and I tried to contain our excitement on this 5 hour flight by watching Beauty and the Beast. Amazing. 

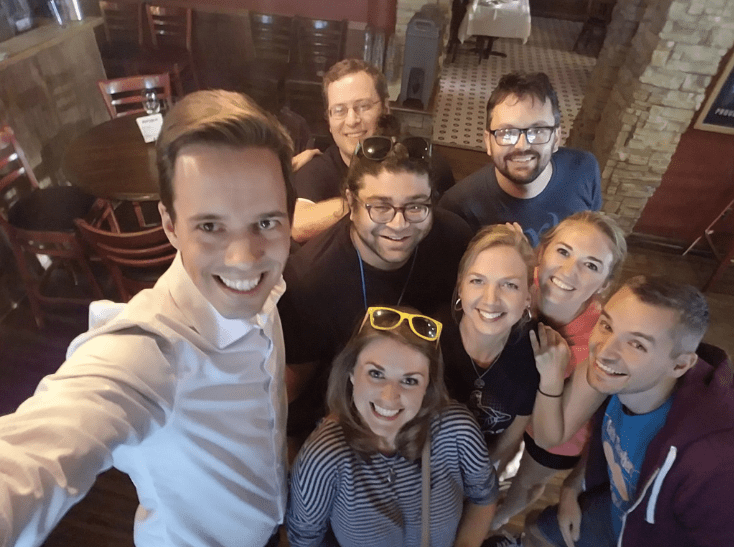
After dropping everything off at our hotel we walked our way to Desmos for some bonding by “math and mingle”. It was great seeing so many #MTBoS friends and meeting people I’ve seen on Twitter and Slack. Pretty great first day 🙂

Over the next two days we were led through various activities and sessions.

Micheal Fenton (@mjfenton) led us through a Points Collector activity. We worked with one computer per pair (promotes conversation). Micheal did not hesitate using the pause button causing a room of competitive math teachers to yell. After working through the activity, he directed us to another activity that focused on the Desmos Guide to Building Great Digital Math Activities . We went through the same activity but focused on the different Desmos pedagogy that was being used throughout. It was amazing to see how intentional Desmos is what creating their activities. It made me reflect on the activities I have created and different areas I could be intentional about.

We participated in a workshop about Desmos design process with Jenny and Shelley. We were able to collaborate with other teachers in our same subject to try and come up with ideas for a new activity to create. I loved that their design process started with writing the goal of the lesson a post it note and then brainstorming slide ideas on a paper folded in eight. When looking at our slide ideas, we had to make sure every slide was intentional with our goal in mind. The design process was definitely intense and at moments felt overwhelming, but you could tell that the Desmos staff knew exactly who they were catering too.

The CEO of Desmos Eli Luberoff (@eluberoff) gave a lunch keynote and shared with us the history of Desmos. It’s amazing to me that Desmos has only been around since 2011 and only started becoming popular in 2014. It has been such a large part of my pre-service education and my classroom since I’ve started teaching. ❤ Desmos.

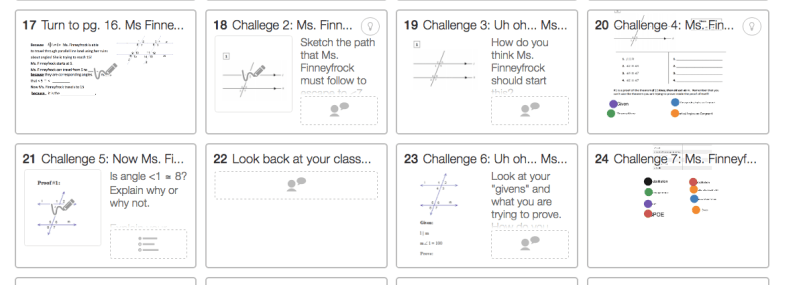
Another large pro of this weekend was receiving access to the computation layer of Desmos where we can construct/edit our own mind-blowing features and activity using code. I tried to work through the computation layer scavenger hunt to learn how to code within Desmos AB. Julie and I created a new feature (with the help of Dan and Eli)  that we like to call the Sketch and Check. Students can sketch a function, press a button, and the function will show up on the same graph. It’s a great way to help students check their work without having to skip through slides.

Goal for the year: Learn how to code. 

We were also lead in a great session by Dan Meyer (@ddmeyer) who led us through the Charge activity to show how to create a need for Desmos in a PD session for teachers who typically love the TI. He also discussed how we could send in videos of ourselves presenting Desmos to Desmos and received feedback. If we are lucky enough and it all passes the Desmos standards then we could present (& get paid for it). I love that they are offering PD to help with presenting skills!

To end a fantastic weekend we had a Game of Thrones screening Sunday night at Desmos HQ after official fellows business was over.  #nerdy.

Overall, Desmos Fellows weekend was an amazing experience. I’m so grateful to be surrounded by and collaborating with such amazing innovative educators. Thanks for a great weekend Desmos! Can’t wait to reunite in a week at #TMC17!

Quadratics and Polynomials on Desmos AB

My Algebra 2 class is largely student-paced through Desmos Activity Builder. Before starting polynomials, we did a small unit on solving quadratics. Below is a collection of Desmos activities  I created for my quadratics unit and the start of my polynomial unit. A lot of these  Desmos activities are created using CPM curriculum.

Quadratics

Quadratic Formula: Students review and practice using the quadratic formula (song included)

Using Roots to Create Quadratic Equations: Students learn how to use roots to create a quadratic equation.

Interactive: Using Roots to Create Quadratic Equations: Practice using roots to write quadratic equations by flying angry birds, catching Pokemon, and going scuba diving!

Projectile Motion – Quadratic Application: Students learn to apply their knowledge of quadratics for projectile motion problems.

Screen Shot 2017-03-14 at 10.49.36 AM

Polynomials

Polygraph Polynomials (Jim Baumgart) – Started off playing polygraph to see what vocabulary they could apply before starting the unit.

What is your end behavior? : Students explore the beginning and end behavior of polynomials.

Graphing Polynomials: Students learn how to graph polynomials by using their roots and dilation/compression.

Match my Polynomial: Coaster Edition (Interactive): Match my polynomial – Roller-coaster edition. Students practice writing equations of polynomials with an added bonus 🙂

Screen Shot 2017-03-14 at 10.48.47 AM


Teaching Parallel Line Proofs: Student-Paced

This year, I have been trying to make my classes mostly student-paced. It really helps differentiate and allows me to answer questions all class.

I started my unit for Parallel Line proofs by exploring parallel and perpendicular lines algebraically. In my geometry course, we explore the geometric and algebraic aspects of almost every unit.

Day 1 : The Desmos activity I created for this unit explored standard, slope-intercept, and transformation (vertex) form. Students also explored what it means algebraically for lines to be parallel or perpendicular. My students have books/workbooks that I put together for each unit that includes guided notes and homework. This activity followed along with the pages below. At the end of class, we pop-corned around the class and discussed the pros and cons of each form.


Day 2: We started looking at parallel lines geometrically, and the angle relationships formed by parallel lines being cut by a transversal. During this class, I used Peardeck and embedded a Geogebra Activity for students to explore angle relationships. The worksheet that went along with the activity went here.  This was a 95-minute class,  so once we finished we practiced labeling out dance boards and played dance dance transversal! 


Day 3: Parallelogram Mazes. I used this last year too. I love it. It gets students really thinking about angle relationships and how you can “jump” from one angle and end at another. I called it “Parallel Line Land” in class.


Day 4: Now it was time to introduce parallel line proofs. I decided to make this class almost entirely student-paced and create it using Desmos Activity building. I was able to scaffold proof building in this activity.  I had students copy the proofs they did on Desmos  ALSO in their notes. desmos


Day 5: Proof practice. Today we used a Desmos Activity and Whiteboarding. This Desmos Activity has student walked through a scaffolded proof of their own, and then they work with their partner on a proof on their whiteboard. I had students walk around and see how/if other groups proved it differently.  Students also created their own “parallel Line land” together and decided what they wanted to prove. They then created their own proof.


Day 6: I created a Desmos Activity that walks students through proving lines are parallel.  It scaffolded the proof process and goes through all of the converse theorems. I utilized the Desmos Pause button a lot during this activity! It gave us the opportunity for a lot of great discussions!


Day 7/8: Review-  On day 7: I gave each student a different proof (there were 10 so I split them up evenly). It was the student’s job to become an expert on the one problem. They  had to create a video explaining how they proved it and upload it onto Seesaw. Instead of adding each student’s name to Seesaw, I grouped everything by problem number. Students uploaded their video to whatever number they became an expert at! By the end of the day, each problem had about 4-6 videos. On day 8, students completed all the proofs! They could call over the “expert” for help or watch the videos! It was a great way to help them study for the test!

More than a Worksheet… with Desmos!

Typically, I use Desmos Activities at the beginning or end of a lesson. I have found it as a great tool to introduce or wrap up a class. However, recently I have been using activity builder more in my classroom every day.  A new thing I have been doing is  pairing Desmos Activites with  worksheets.

Pros of pairing them together

  • Students are writing more!
    • After students complete one problem on their sheet, they follow along with the Desmos Activity until they are told to stop and move to the next problem.
    • Problems go more in depth after they solve it on their paper. Students are asked to explain their answers.
  • Students can check their answers.
    • Instead of being called over to ask if “they did it right” students can check their answers on their own and move at their own pace.
    • Students can also compare their answers with other students all around the room
  • You know how ALL of your students are doing at all times
    • You can see if they are doing it correctly all in one place. I’ll walk around with my iPad as I help students.
    • If you realize that a lot of students are struggling with a certain problem you can put the activity on teacher mode  and talk about it as a class.
  • You get immediate Feedback!
    • This is a great space to give an “exit ticket”, see where students are, and how you can help them!

Here is an example of a worksheet and the Desmos Activity that goes along with it about graphing and solving systems of equations.

This example is practice graphing systems of equations: Worksheet & Desmos Activity.

screen-shot-2016-09-26-at-8-13-24-pm

Day 0: #DESCON16.

As if going to my first Twitter Math Camp wasn’t enough, I also got to attend an entire day of Desmos! I just finished my first year of teaching and Desmos has been a staple in all of my classes. To the say the least, I was VERY excited.

The day started with breakfast and a video message from Eli from Germany. Then the Desmos team started showing us some awesome new Desmos Graph features and a Desmos Potluck. One of the  newest features makes Desmos accessibility for blind and low-vision studends. Pressing command F5 turns on the sound narrator which will allow Desmos to audibly describe your graph. You can also HEAR what your graph sounds like! During a session, a group of teachers worked together to create a graphical representation of “Mary had a Little Lamb” https://www.desmos.com/calculator/xdz17jn1rw SO COOL. This new feature is not only amazing for the low-vision students, but also opens up so many opportunities for interdisciplinary projects in Desmos!

During the day, we broke into groups and participated in a Desmos Graph scavenger hunt. During this scavenger hunt, I learned about another great Desmos feature http://learn.desmos.com/. This site provides interactive instructional activities on how to use different features on Desmos. I definitely had fun playing around with polar graphing!

Lunch time! (thanks  Desmos!).

Then we got to hear from our first keynote speaking.  Sara VanDerWerf. She was encouraging us to be “evangelists”!

Now for the best part: The Desmos team introduced two new features to the activity builder.

  • Bundles: Desmos has taken a bunch of activities and “bundled” them into topics. These bundles are not only a bunch of content similar activities bundled together. The bundles also provides  key understandings and  suggest the order in which the activities should be played! This is an example of a Functions Bundle.


Screen Shot 2016-07-16 at 6.09.40 PM

  • Create your own cardsorts and marbleslides:  HALLELUJAH!   They now let you make your own marbleslides and card sorts! No more laminating, cutting, missing cards to do card sorting in class! It’s amazing! I made my first one on sorting different types of quadratic  equations.  We also created a collection of our card sorts! To activate the feature, just click on your name in the top right, then go to labs, and enable them.

After a day of Desmos fun, the Desmos team then took us out for Happy Hour!!!  Thanks Dan, Christopher, Michael and the whole Desmos crew for a great day! And Obviously, we had to take a selfie with Dan Meyer!


Screen Shot 2016-07-16 at 6.27.01 PM


Dynamic Transformations using PearDeck and Desmos

I decided to teach geometric transformations (excluding rotations)  using a dynamic approach.  I also added in absolute value transformations so they could see transformations in point-slope/vertex/transformation form.

Day 1 – Translations

I started class by having my students sign into my PearDeck presentation for the day. When they signed in they were taken directly to a Translations Desmos Activity created by Andrew Stadel to introduce Translations. I had students sign into their accounts, so they could go back and look at their work on the activity later. Students worked through the activity at their own pace and once they all finished we moved to the next PearDeck slide.

Screen Shot 2016-02-17 at 4.04.38 PM

Instead of standing up at the front  board and “lecturing” about translations and how to do them, we were able to have a discussion! Students already knew how to translate figures! I used the drawing tool on PearDeck to practice translations. Students were asked to describe translations and then actually then translate them on their screens. While they were practicing, I was able to see the work of EVERY student on my Ipad. This allowed me to see instantly when a student was going in the wrong direction or plotted a point incorrectly. If I wanted to sit in my chair in the front of the room, I could still see every students’ progress and work as it was happening.


Day 2- Reflections

Reflections started the same way. Once they logged onto PearDeck they were taken to Cathy Yenca’s Reflections Desmos Activity. After students
explored on Desmos, we
came together as a class and practiced reflections on PearDeck.

Screen Shot 2016-02-17 at 4.04.18 PMScreen Shot 2016-02-17 at 3.34.27 PM


Day 3- Dilations

Screen Shot 2016-02-17 at 4.02.35 PMFor Dilations, I decided to create my own Desmos Activity to start the lesson.  After they worked through the activity we had a great conversation of dilations and scale factors. This conversation helped WONDERS when I introduced similarity the following week. Students then practiced dilating images through PearDeck.

I also created a Desmos Polygraph to practice the transformations we learned so far. Students LOVE playing polygraph. It truly does help them speak mathematically and it’s a lot of fun 🙂

Day 4- Absolute Value Transformation

I created my Absolute Value Desmos Activity by editing an activitScreen Shot 2016-02-17 at 3.59.52 PMy created by Faith. As we did the previous days, students started with the activity and then we moved to practicing and discussing in PearDeck. In class, we called point-slope/vertex form transformation form. I have been introducing this form all year, so my students had seen it before. I think that it’s important to make the connection from geometric to algebraic transformations. We didn’t spend a plethora of time on it, but I think it really helps when they move on to Algebra 2.


Anyhow, using Desmos Activities to discover and learn transformations and PearDeck to practice worked out beautifully. Check out my Desmos and PearDeck pages to learn more about each of them!


Holy Polygraph, Batman!

Although I am an active user and creator of Desmos Activity builder, this week was my first time ever using  Desmos Polygraphs. Oh my Gosh, let me tell you… this activity was so much fun!!  Remarks that I received from my students were….

“Can we play this all class?”     “Let’s keep playing through break!”

“This is helping so much!” 

Polygraph takes after the board game  Guess Who?! When students sign into the polygraph they are partnered with another student in the class. One student is the picker and the other is the guesser. The picture chooses an object and the guesser has to ask yes/no questions to try and figure out the object. When one pair finishes a game then they become paired with another student. SO MUCH FUN.

This week I played Polygraph in both my geometry and algebra 1 class.

Geometry

I first decided to try Polygraph after reading the Geometry Teacher Blog created by Andrew Shauver. His site has a TON of great resources for geometry. I was starting Polygons this week and I saw that he posted two links. One for  Desmos Polygraph Basic Quadrilaterals and the other for Desmos Polygraph Advanced Quadrilaterals .

I love Desmos, but I never used Polygraph. I wanted to try it out and understand it, so I actually signed in as two different people and played myself!! 😝 It was so much fun!

I introduced these polygraphs to my class after we discovered the different types of special quadrilaterals. I wanted them to practice their vocab by asking yes/no questions to figure out which quadrilateral their partner chose. My students loved it! They said it really helped them define the different types of quadrilaterals. It was a great way to learn special quadrilaterals instead of memorizing their differences.

IMG_6936

Algebra 1

I used Polygraph to introduce scatter plots to my algebra 1 class. Before I explained scatter plots and correlations I had my students sign in and play each other. They were describing the scatter plots using vocab that I didn’t teach them yet!! It was funny because I had one student ask “What does this have to do with math?!!” I kept telling him to trust me and it would all fit together.  I let them play for about 15 minutes before pulling my class back together. I showed a positive correlation scatter plot and asked my students to describe what they saw. I then had a student come up to the board and draw a line through the data that they thought would best describe it. This is when my students made the connection with a postive correlation and positive slope. YAY slope. We then did the same thing with negative and no correlations. We also looked at strong, moderate and weak correlations.

Next I had students go back to Polygraph to play again. This time, they had to use the vocabulary we discussed to describe and eliminate each scatter plot. It was great to see how their use of vocabulary improved the move games they played.

If you haven’t played Polygraph yet I definitely recommend it. There are a ton in Desmos, but you can also create your own! Don’t be like me and wait so long to try it!!!